

Accessibility Standards for Australian Buildings Explained
You're standing in the kitchen with a tape measure, a rough sketch, and a builder telling you the bathroom can be “made to work”. That's the moment accessibility stops being an abstract rule and turns into a design decision that affects every door, corridor, threshold, and wet area in the house. If you're renovating, extending, or fitting out an Adelaide property, accessibility standards are not just for hospitals, schools, or big public buildings. They shape the homes people live in, the projects developers sell, and the alterations that either age well or become a regret.
Australia's framework is built around real legal obligations, not good intentions. The Disability Discrimination Act 1992 and the Disability (Access to Premises, Buildings) Standards 2010 gave accessibility a clearer technical footing, and the National Construction Code sits alongside them as the practical rulebook for certifiers and designers. The point for a homeowner is simple. If the design can't be used comfortably by more people, it will eventually cost more to fix.
Why Accessibility Standards Matter on Your Next Renovation
A family starts a renovation thinking about a bigger kitchen, a second bathroom, or a rear extension that opens up the living area. Then someone asks whether Nana can still get through the hallway, whether the shower will work after a hip replacement, or whether the front step is about to become a daily problem. That's where the conversation changes. Accessibility standards are really about whether the house will still function when life changes.
The old assumption is the expensive one
A lot of Adelaide owners still treat accessibility as something for later, or for other people. That's a mistake. The scale matters, because around one in five Australians lives with disability according to Australian Bureau of Statistics data discussed in the accessibility dataset referenced in the brief, and that means accessible circulation, door widths, step-free entries, bathroom layout, and wayfinding are not edge cases. They affect a large share of end users, including visitors, ageing parents, children, and buyers who want a home that won't fight them.
The law has followed that reality. Australia's accessibility framework moved from broad discrimination law into a more defined technical regime for building work, especially after the Disability (Access to Premises, Buildings) Standards 2010 were gazetted in 2011 and started working with the National Construction Code to give certifiers a clearer compliance pathway. That shift matters on a renovation because the question is no longer “can we make this nicer?”, it's “can we make this usable without creating a future compliance or resale problem?” Australian building access standards overview
Practical rule: If a change affects how someone enters, moves through, or uses the house, treat it as an accessibility decision first and a style decision second.
Private homes still feel the pressure
Even when a single dwelling isn't facing the same rule set as a public building, the design pressure is still there. Homeowners want ageing-in-place options. Developers want layouts buyers won't reject. Builders want fewer variations once framing starts. The result is the same. A narrow doorway, awkward fall to the patio, or poorly planned bathroom can limit the whole project.
The smartest way to approach a renovation is to test the hard points early, before demolition. Check the entry, the bathroom, the circulation path, and the transition between inside and outside. If those four things are wrong, the rest of the finish won't save you. If they're right, the house feels easier for everyone without needing to announce itself as “accessible”.
The Australian Regulatory Stack Explained
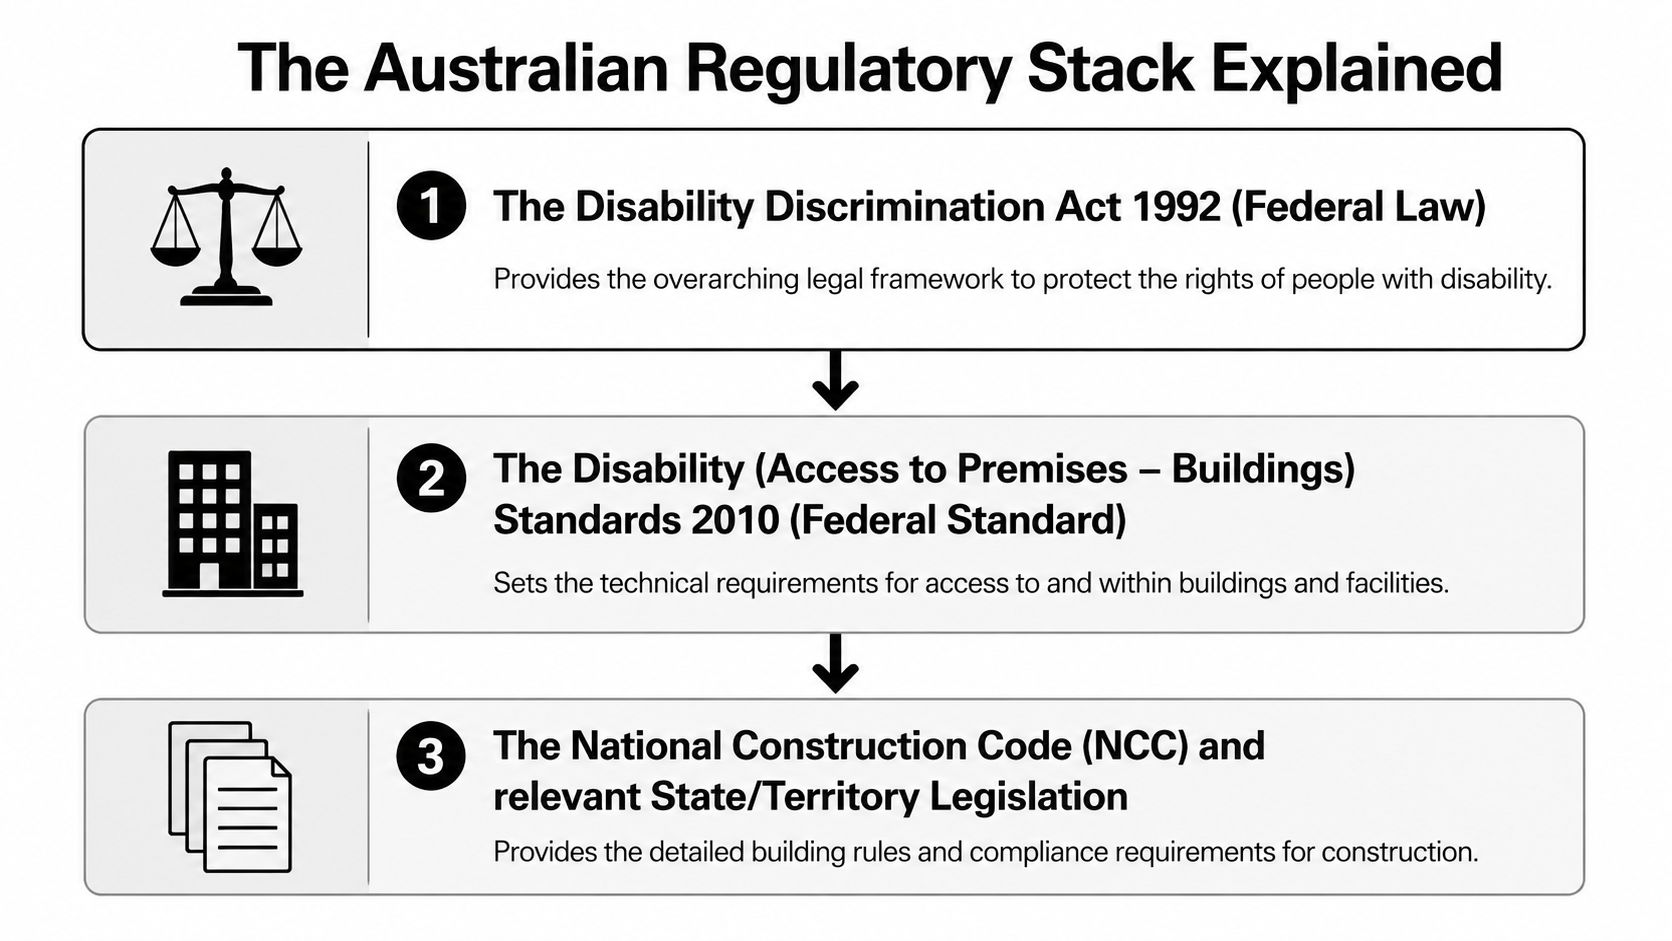
Accessibility in Australia isn't one rule. It's a stack. Homeowners get caught when they only hear one acronym at a time, then assume the rest is optional. It's not that simple. The Disability Discrimination Act 1992 sets the anti-discrimination baseline, the Premises Standards give building access requirements a technical pathway, and the National Construction Code turns that into the document certifiers work from.
How the layers fit together
The Disability Discrimination Act 1992 (Cth) is the legal foundation. It created the national anti-discrimination framework, and the modern accessibility regime for buildings grew out of that base. The Disability (Access to Premises, Buildings) Standards 2010 then translated the broad legal obligation into building-specific requirements, which is why they matter so much for designers, certifiers, and developers. The brief makes this clear, accessibility moved from broad discrimination law to a more defined technical regime for new work, and that gave Australia a nationally consistent standard for access to public buildings.
That consistency is the win. Before that, accessibility could feel like a patchwork of state interpretations. Now the compliance conversation has a clearer path, especially when the Premises Standards operate with the National Construction Code. For a homeowner, that means your designer is not guessing. They're working within a national framework that's been built to be checked.
Standards, guidelines, and what people confuse
People often get sloppy. AS 1428 is the design language many architects and builders reference for access and mobility details. The Livable Housing Australia Guidelines sit in a different lane, they're not the same thing as mandatory law, but they influence how future-proofed a home feels. The design standard and the livable housing approach may overlap in spirit, yet one is typically used as a technical benchmark and the other as a voluntary livability guide.
A certifier checks the enforceable path. A good builder checks the lived experience too.
For Adelaide projects, that distinction matters because not every room is judged the same way. A retail fit-out, a common area in a multi-residential building, or a public-facing tenancy will usually be looked at more strictly than a private single dwelling. The regulatory stack is why your architect might quote one document, your building surveyor another, and your practical brief a third. They're not contradicting each other. They're operating at different layers of the same system.
Residential Versus Commercial Compliance
A lot of general advice pretends every building is treated the same. It isn't. A private home, a multi-residential common area, and a retail tenancy all bring different obligations, different reviewers, and different levels of scrutiny. If you're renovating a family home in Adelaide, the compliance load is usually lighter than in a commercial fit-out, but the design consequences can still be just as real.
The private home gets more latitude, not a free pass
Single dwellings are often where people have the most freedom, especially when they're working within voluntary livability goals rather than strict public-building access rules. That said, a private home still gets dragged into accessibility thinking when a development approval, an overlay, or a specific project brief asks for it. The practical issue is obvious. If you are widening a hallway or reworking a bathroom in an existing house, the structure already exists, so the question becomes what you can reasonably modify without creating a bad plan elsewhere.
Multi-residential projects sit in a tougher spot. Shared areas and common paths of travel can attract the Premises Standards and the National Construction Code more directly, which is why project developments and common circulation zones need careful documentation. Commercial projects are tighter again, because there's usually less tolerance for ambiguity and less room to treat access as an afterthought. That's why an office fit-out brief often needs more upfront scrutiny than a private kitchen extension. Office fit-out requirements for commercial projects
The parts people get caught on
The hard lesson for homeowners is that the structure doesn't care what the room is called. A narrow doorway is still narrow. A step at a threshold is still a step. A bathroom that only works if someone pivots sideways is still a problem.
State variations and council overlays can also tighten the baseline. That's where people get surprised. A design that seems workable in a suburban renovation can run into issues once the planning path or local conditions are checked. Don't assume the minimum in one project will carry over neatly to another.
Here's the practical split:
- Private dwellings: more room for voluntary livability choices, but still vulnerable to DA conditions and bad planning.
- Multi-residential common areas: closer scrutiny, especially for access routes and shared amenities.
- Commercial and public-facing work: the strictest documentation, with certifiers and consultants expecting a clearer compliance trail.
If you're a homeowner, the right question is not “does this apply to me in full?” It's “which parts of my renovation are likely to be checked, and which ones should I get right anyway because they're hard to fix later?”
Practical Design Requirements Builders Work To
Accessibility stops being theory and becomes tape measure work. The details matter because they decide whether the house can be used, not just approved on paper. Builders, designers, and certifiers keep coming back to the same dimensions because they solve the same problems, getting a body, a mobility aid, or a trolley through a space without friction.
The numbers that keep showing up
The brief gives the core dimensions people ask for most often. Door leaf width of 820mm minimum, 1500mm turning circles in bathrooms, and gradients no steeper than 1:14 for level access are the figures that often shape the plan before anything else is chosen. Handrails, step-free thresholds, lever hardware, and contrast detailing matter too, but they only work properly when the bigger geometry has been sorted first.
That's why AS 1428.1 keeps showing up in design conversations. It gives a circulation logic around fixtures, doors, and accessible routes, which is exactly what gets squeezed in a retrofit. You can change tapware later. You can't easily invent another 100mm of corridor width once the wall is framed.
| Element | Standard Reference | Typical Minimum |
|---|---|---|
| Entry access path | Accessibility design practice tied to NCC and AS 1428.1 | 1:14 gradient for level access |
| Door leaf width | AS 1428.1 referenced design practice | 820mm |
| Bathroom turning space | AS 1428.1 referenced design practice | 1500mm turning circle |
| Thresholds | Accessible design detailing | Step-free or as near as possible |
| Hardware | Accessible hardware practice | Lever-style handles instead of knobs |
The details that save a renovation
Kitchens and bathrooms are where accessibility gets won or lost. In the kitchen, clear circulation and sensible benchtop planning matter more than fancy finishes. In the bathroom, the shower hob, basin placement, and door swing can wreck the whole room if they're not coordinated early. A good accessible layout feels plain because it isn't fighting itself.
The best move is to lock in access geometry before you lock in cabinetry. That means checking the route from the entry, through the hall, into the wet area, and back again. If a wheelchair, walker, or even a trades trolley can't move cleanly, the room is already underperforming. Accessible home design principles and layout planning
Builder's rule of thumb: if you need a special explanation for how someone gets into the room, the room probably isn't accessible enough yet.
Also think about what the eye and hand need. Contrasting nosing strips help define edges. Lever handles are easier to operate than knobs. Step-free thresholds reduce trip risk and make cleaning, pram access, and mobility use simpler. None of that is decorative garnish. It's functional design.
A Working Compliance Checklist for Your Project
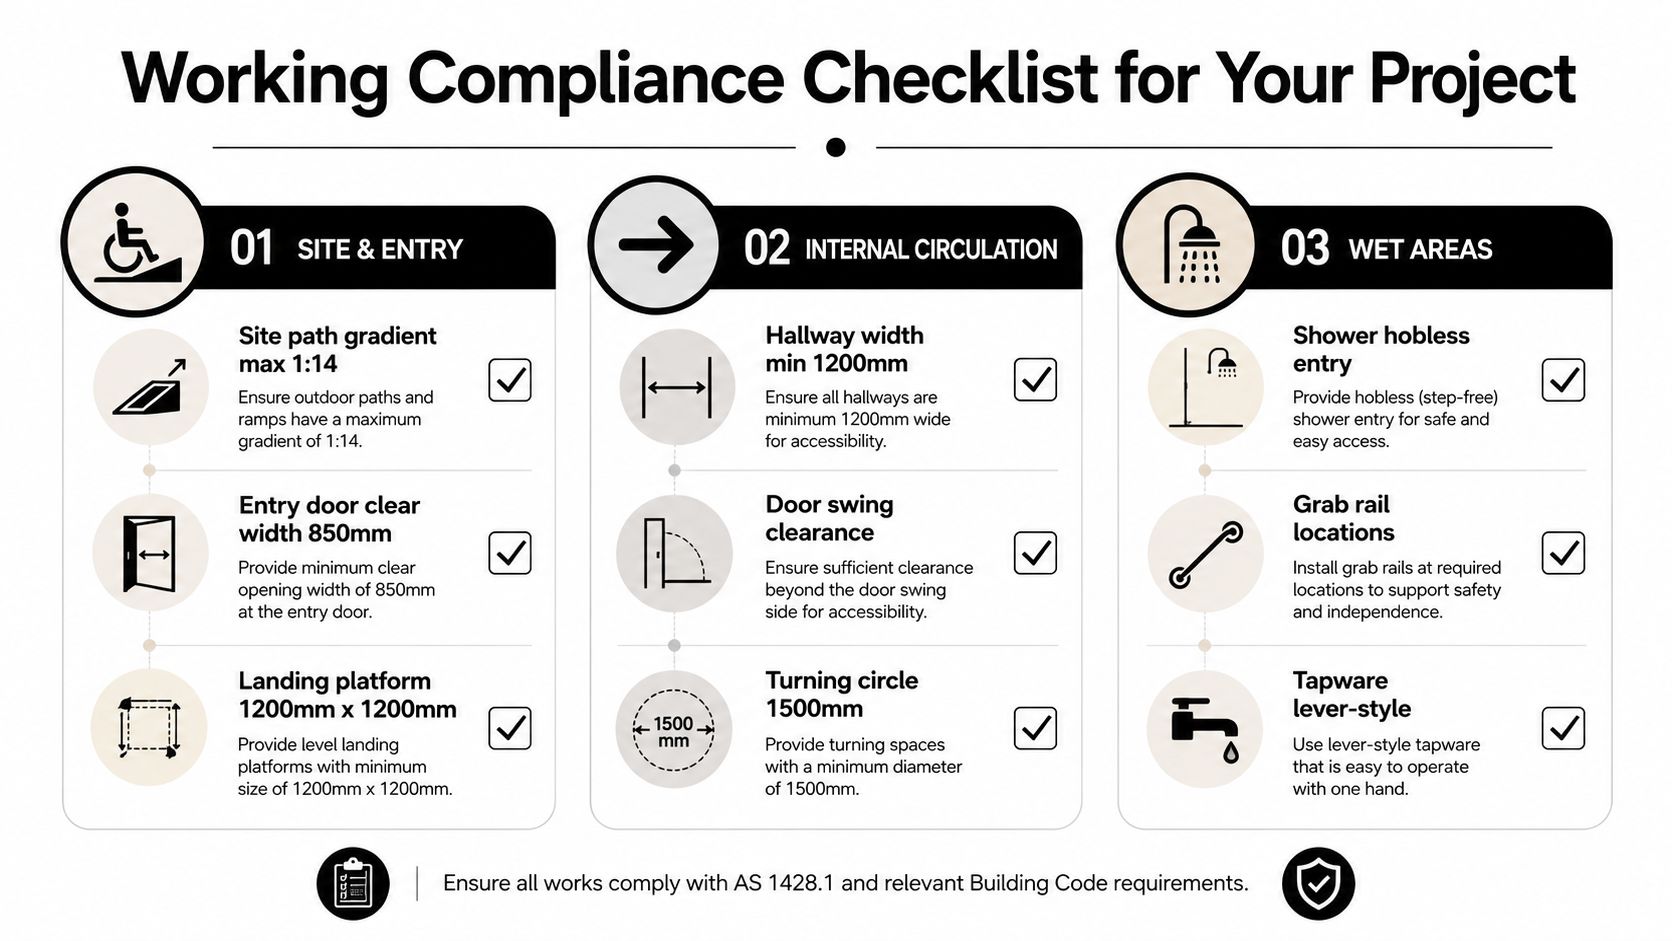
A good checklist does not start with “what looks nice”. It starts with the route in, the movement through the house, and the wet areas where failures become daily annoyances. Keep this list in front of you when you meet the builder or designer. If they can't answer these points clearly, the drawings aren't ready.
Site and entry
Start at the street and work inward. A smooth path, sensible fall, and a usable landing matter more than a flashy front door.
- Path gradient: check whether the entry route can realistically stay close to 1:14 rather than being patched with a last-minute step.
- Door opening: confirm the entrance gives enough clear width for practical use, not just a nominal opening on the drawing.
- Landing space: make sure there is room to pause, turn, and open the door without backing into a wall or planter.
Internal circulation
The inside of the house should not force awkward turns or side-stepping. That's especially true in older Adelaide homes where hallways were never designed with access in mind.
- Hall width: ask whether the corridor can carry the furniture, the person, and the future mobility aid without becoming a bottleneck.
- Door swings: check that doors don't collide with circulation paths or block wet area access.
- Turning space: in bathrooms and tight rooms, confirm there's room to manoeuvre rather than just squeeze in.
Wet areas and kitchen
Poor planning is most expensive. Changing a bathroom later costs far more than getting the framing right now.
- Shower entry: favour a hobless or near-level entry where the structure allows it.
- Tapware: use lever-style controls.
- Kitchen layout: keep prep zones and access routes clear, especially if someone may sit, lean, or assist during use.
A classic renovation trap is adding a step to manage floor falls because it looks easier on paper. It isn't. You've solved one problem by creating another. The better move is to regrade, replan, or rework the threshold before the slab and finishes lock you in.
Cost, Planning and Trade-Off Considerations
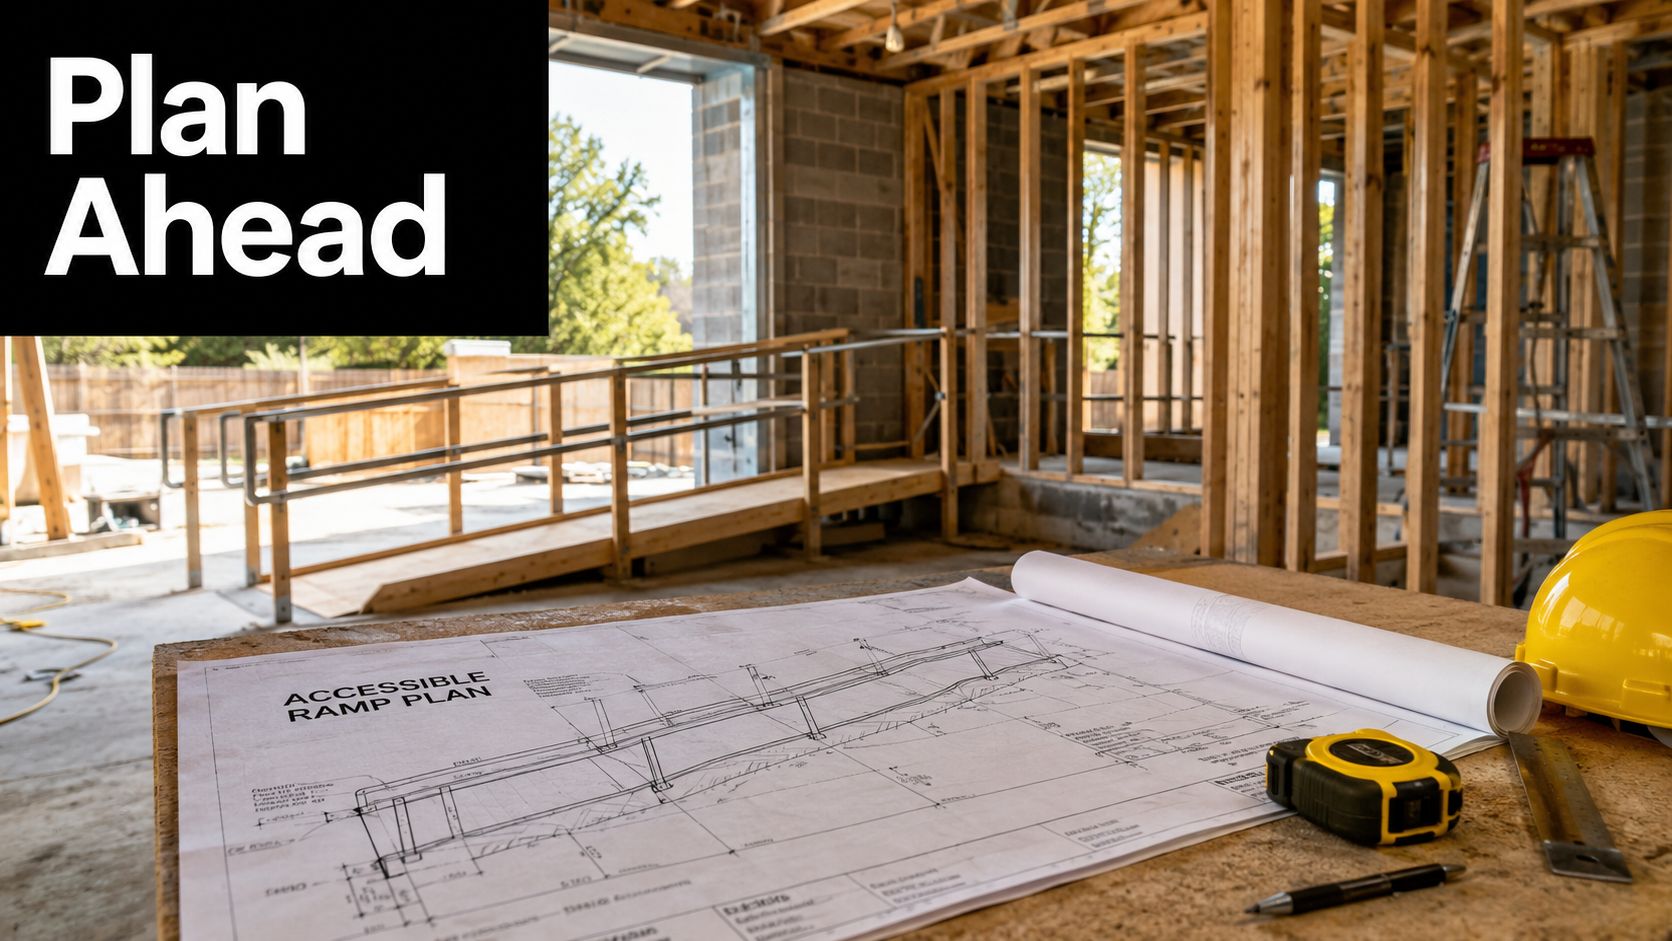
Accessibility is cheaper during the build than after it. That's not a slogan, it's how construction works. A wider doorway, a reinforced bathroom wall, or a step-free entry is comparatively straightforward when the frame is open. Try to force those changes after plaster, tiles, and finishes are complete, and the job gets messy fast.
Where the money usually goes
The biggest cost swing is usually not the visible hardware. It's the hidden work. Moving walls, adjusting falls, reframing wet areas, and reworking the entry zone all push the job up because they touch multiple trades at once. A retrofit also tends to expose knock-on issues, like drainage, structural limits, or a slab edge that won't cooperate.
That's why good planning beats optimism. If you know you need access, build for it from day one. If you wait until the tiles are selected and the joinery is signed off, you're buying trouble. In older homes especially, the existing structure often decides the ceiling on what's possible, not your wish list.
Approvals and timing
The planning path matters too. In Adelaide, a project might move through a development approval pathway or a faster consent route depending on the scope, but accessibility decisions should be settled before lodgement whenever possible. If the room sizes, thresholds, or circulation paths are still unresolved, the approval process just freezes your uncertainty in place.
That's when an access consultant or access report earns its keep. Use one when the project has tight constraints, shared areas, or a brief that needs to balance compliance with real-world use. It's a smarter spend than redesigning after the builder has already priced around a bad layout.
The trade-off is simple. Spend earlier and you keep options open. Spend later and every fix competes with what's already been built. If the project is meant to last, that decision is easy.
Working With a Builder on Accessibility in Adelaide
A proper accessible project starts with a walk through the house, not a sales pitch. Bring the existing plans if you have them, photos of the bathroom and entry, and any occupational therapist or access report that already exists. A good builder will use that information to test what can be changed cleanly, what needs design adjustment, and what has to be locked in before demolition.
That's the point where an Adelaide builder should talk plainly about structure, falls, and practical limits. Some decisions are easy on site, like fixture selection or which direction a door should swing. Others need sign-off before anything is pulled apart, especially if the access route depends on wall moves, floor levels, or bathroom framing. If you skip that discussion, the job becomes a patch-up exercise.
Templeton Built's home modifications work sits in the middle of that process, because accessible design often overlaps with renovation logic rather than living in a separate category. The right team should be able to take a brief, shape the drawings, price the work accurately, and carry it through council or CDC steps without losing the practical intent. Templeton Built's aged care home modifications
What good access design looks like in the finished house is almost boring. The doorway just works. The shower doesn't fight you. The circulation feels obvious. That's what you want, because the best accessibility is the kind no one has to think about every time they walk in the room.
If you want a builder who treats accessibility as part of real renovation work, not a token add-on, speak with Templeton Built about your Adelaide project. They can help you test the layout, weigh the trade-offs, and turn the compliance language into a buildable plan that suits the way you live.


Leave a Reply