

Design Build Construction Process: Stages & Benefits
You're probably at the stage where the project feels exciting and heavy at the same time. You've got ideas for the layout, a rough sense of budget, maybe screenshots saved on your phone, and a growing concern about how many people you'll need to coordinate to get from concept to keys.
That concern is justified. A building project can run smoothly, but it doesn't happen by accident. The way the project is structured matters just as much as the quality of the finishes or the skill of the trades on site.
The design build construction process is one way to remove a lot of the friction that clients usually assume is unavoidable. Instead of splitting design and construction into separate camps, it brings them into one joined-up process. For homeowners planning a renovation or extension, and for developers who need clearer control over time, cost, and accountability, that difference is practical, not theoretical.
Why the Traditional Building Approach Is Broken
A lot of people still assume the safest path is to hire a designer first, finish the plans, send them out for pricing, then choose a builder. On paper, that sounds orderly. In practice, it often creates the exact problems clients are trying to avoid.
The weak point is the handover between design and construction. That's where assumptions get exposed, details get reinterpreted, and budget shock usually arrives. According to Australian construction stage data from BCI Central, 68% of renovation disputes in Australia arise from misaligned design specifications and unapproved change orders during the transition between design and construction, with the separation of duties leading to 20–30% schedule delays and 15–25% cost overruns on complex extensions.
That's the part many clients don't see coming. The plans may look resolved. The design meetings may feel productive. But if the team that priced and built the work wasn't involved early enough, the project can still unravel once real-world site conditions, engineering requirements, selections, and compliance issues start landing.
Where the breakdown usually happens
In a fragmented process, each party only controls part of the journey:
- The designer develops the concept: That doesn't guarantee the details are cost-aligned or easy to build.
- The builder prices completed documents: By that point, opportunities to simplify structure, staging, or materials can be harder to capture.
- The client sits in the middle: When issues arise, the client often has to sort out who is responsible.
Practical rule: If your designer and builder only start properly talking after the drawings are finished, you're already carrying avoidable risk.
Why this matters more in renovations and extensions
Renovations are rarely neat. Existing structures hide surprises. Floor levels don't always match. Services run where you wish they didn't. Council and documentation issues can affect scope. In that environment, a disconnected process doesn't protect you. It usually makes every surprise more expensive.
The problem isn't that architects, designers, or builders are doing poor work. The problem is the gap between them. A process with split responsibility creates blind spots, and clients pay for those blind spots in time, stress, and variation costs.
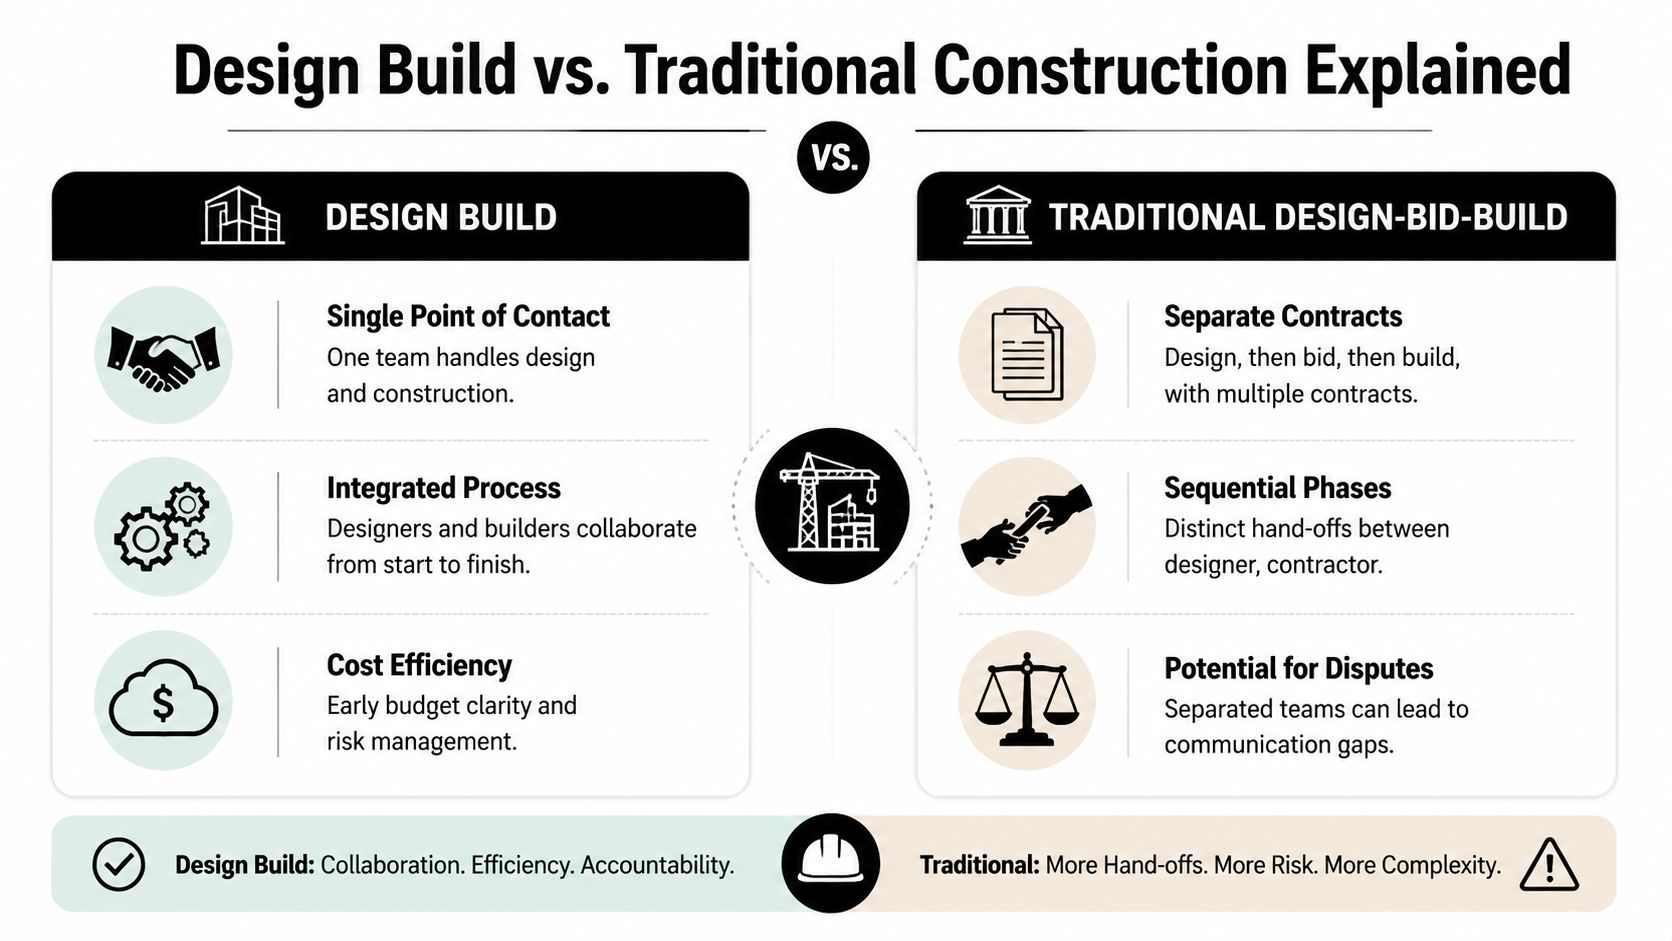
Design Build vs Traditional Construction Explained
A common scenario looks like this. The plans are finished, the pricing comes back higher than expected, and the builder starts raising issues about structure, services, access, or compliance that were not resolved earlier. At that point, the client is paying for redesign, waiting on revised documents, and trying to work out who owns the problem.
Design build reduces that gap by putting design and construction under one contract and one accountable team. Traditional design-bid-build keeps them separate. The difference is not just administrative. It changes when risks are identified, how costs are tested, and who carries responsibility when the project needs to adapt.
What changes on a real project
In the traditional route, the sequence is fixed. Design is completed first, then priced, then prepared for construction. If the builder finds a detail that is expensive to execute, difficult to stage, or inconsistent with site conditions, the job often goes back for revision. That can mean extra consultant fees, delayed approvals, and a budget that moves after the client thought key decisions were settled.
In a design build model, those checks happen earlier. The builder, designer, and relevant consultants work through cost, buildability, materials, and construction methodology while the design is still being developed. That does not remove complexity. It brings it forward, where changes are cheaper and easier to make.
This matters most where existing conditions can shift the job quickly. Renovations, extensions, sloping sites, constrained access, and occupied homes all benefit from earlier construction input.
Side-by-side comparison
| Attribute | Design-Build | Traditional (Design-Bid-Build) |
|---|---|---|
| Contract structure | One contract covering design and construction | Separate contracts for design and construction |
| Main point of contact | One integrated team | Multiple parties with separate responsibilities |
| Project flow | Design and construction planning progress together | Sequential with handovers |
| Budget feedback | Tested during design development | Often clearer only after pricing stage |
| Risk allocation | More consolidated | More fragmented |
| Dispute potential | Lower when scope and responsibility sit with one team | Higher when documentation gaps or scope assumptions appear |
| Client experience | Single point of contact | More coordination required from the client |
Why clients choose this model
The main benefit is earlier alignment between concept, budget, documentation, and site delivery.
- Cost feedback comes in earlier: If a layout, structural idea, or finish selection is pushing the budget, it can be addressed before full documentation is locked in.
- Construction input shapes the details: Trades, staging, access, and procurement can influence decisions before they become expensive variations.
- Problems are handled inside one team: Clients are less likely to end up between a designer, builder, and consultant all pointing in different directions.
- Documentation can be developed with delivery in mind: That is especially useful during the construction documentation phase, where decisions on detailing, scope clarity, and coordination directly affect pricing and site performance.
A well-run design build process still requires decisions from the client. It puts those decisions at the point where they are most useful.
The trade-offs to understand
Design build is not the right fit for every client. Some people want fully independent design completed first, then sent to several builders for competitive pricing. That approach can suit clients who want a separate consultant relationship and are comfortable managing a more fragmented process.
The trade-off is coordination. Separate appointments can give the client more independence at the front end, but they also tend to create more handovers, more qualification notes in quotes, and more room for scope assumptions to slip through.
For residential renovations, extensions, custom homes, and many commercial fit-outs, clients usually want clear accountability. One team owns the advice, the pricing logic, the documentation path, and the build outcome. That is the practical difference.
The Design Build Construction Process Step by Step
You have a block in Adelaide, a budget range, and a rough idea of what you want to build. In a fragmented delivery model, that can mean months of design work before a builder prices the job and points out what does not fit the site, the approval path, or the budget. In design build, those checks happen as the project takes shape, which cuts down avoidable redesign, scope gaps, and late cost shocks.
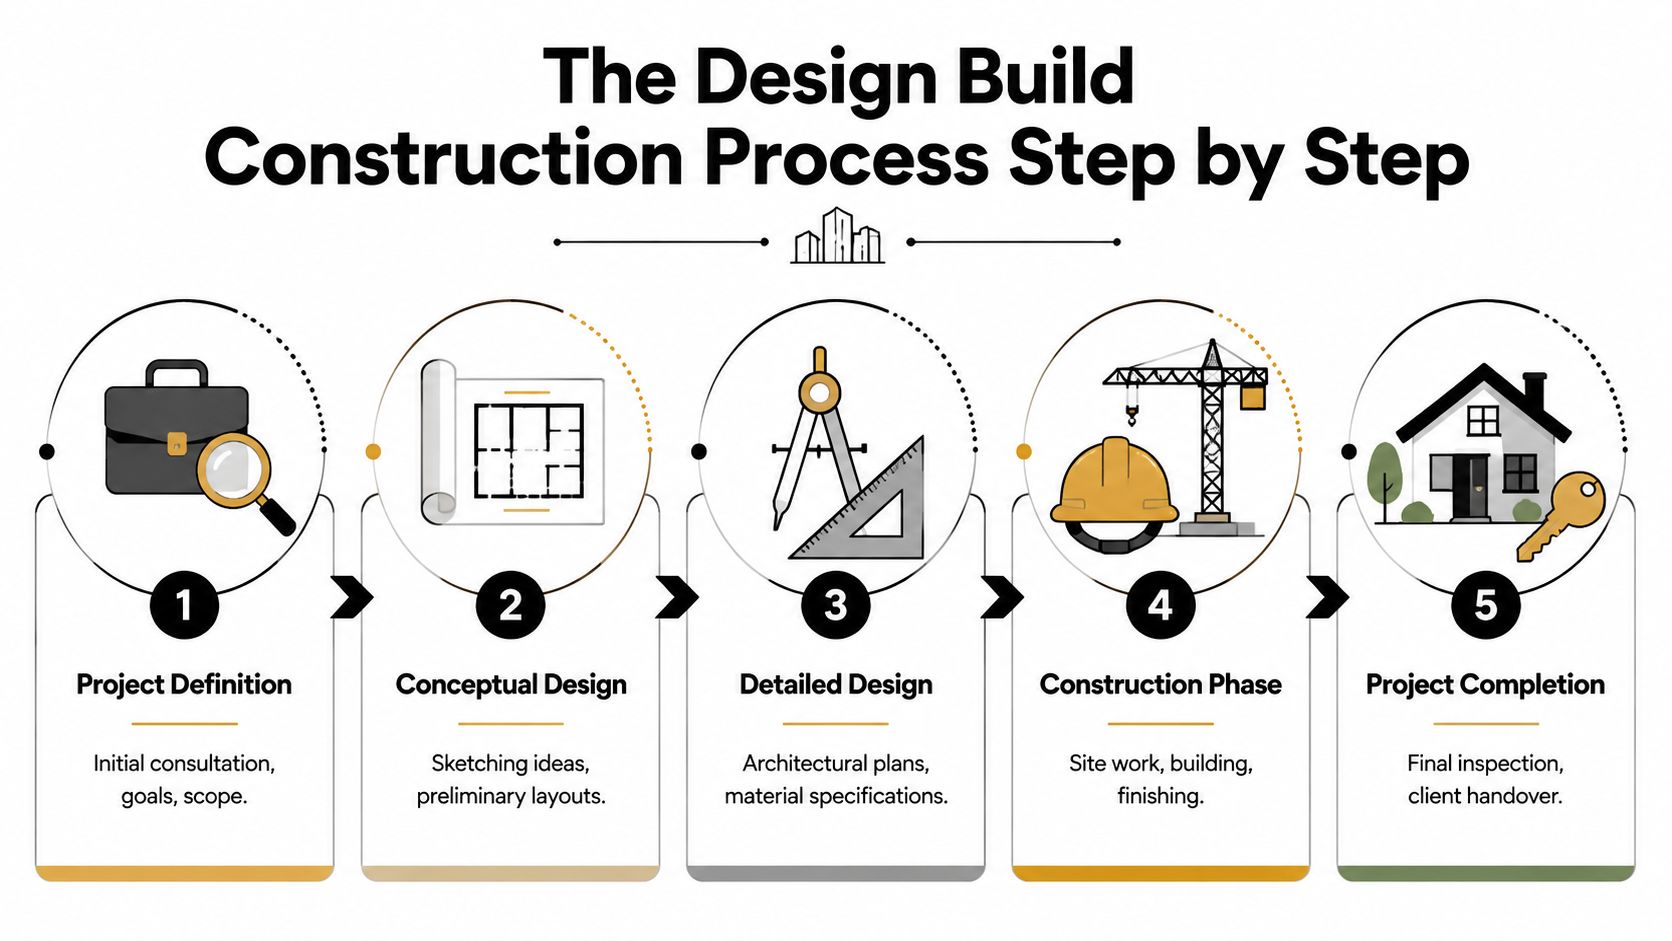
Stage 1 Initial concept and feasibility
The first step is to test the brief against reality.
That means reviewing the site, your priorities, likely planning constraints, access, services, orientation, and the level of finish you expect. For a renovation or extension, it also means looking hard at the existing building. Roof lines, floor levels, drainage, structure, and access often shape the solution more than the early sketches do. For a developer, feasibility, yield, staging, and approval strategy usually sit front and centre.
This stage saves money because weak ideas are filtered out early. If the brief and the budget are too far apart, it is better to know then, not after months of design fees.
- Client role: Set the priorities. Budget, timing, layout, must-haves, and nice-to-haves.
- Team role: Test what stacks up on the site and flag risks early.
- Why it matters: Early feasibility work reduces redesign and gives the project a more reliable starting point.
Stage 2 Concept design
Once the brief is grounded, the project moves into concept design. Plans, layouts, form, and material direction start to come together.
Good design demands construction input. A plan can look clean on paper and still create structural inefficiencies, awkward services runs, difficult waterproofing details, or staging problems during the build. On tight suburban sites across Adelaide, those issues are common. So are assumptions about excavation, retaining, or access that change the cost materially once the builder reviews them.
The concept stage works best when design intent and buildability are tested together, not one after the other.
Stage 3 Design development
Broad ideas turn into a buildable project, with structure, finishes, services, joinery intent, key dimensions, and compliance requirements all becoming more defined.
Client decisions matter here. Delayed selections on windows, fixtures, appliances, cladding, or internal finishes can slow documentation and leave too much open to allowances later. Early decisions usually produce cleaner pricing and fewer surprises on site.
For a closer look at what gets resolved in this part of the process, our guide to the construction documentation phase explains the level of detail that supports accurate pricing and smoother delivery.
Stage 4 Approvals and documentation
Approvals are not glamorous, but they protect the project from preventable delays and compliance problems. Depending on the scope, this stage can include planning consent, building rules assessment, engineering, energy efficiency input, specialist consultant coordination, and the documents needed for construction.
The quality of documentation matters. If drawings leave too much open to interpretation, pricing gets padded with assumptions or pushed into variations later. If consultant information is not coordinated, site questions multiply once work starts. In practice, that usually means delays, rework, or disputes over who allowed for what.
A well-prepared design-build package sets performance expectations clearly, coordinates the moving parts, and gives the site team something they can build from with confidence.
Stage 5 Pricing and contract
Pricing should feel like the outcome of the earlier work, not a surprise at the end of it.
By this point, the major scope items, build method, and documentation should be developed enough to test cost with more confidence. There may still be allowances or selections to finalise, but they should be visible and discussed plainly. That lets clients make trade-offs with their eyes open. Spend more on glazing and simplify joinery. Keep the footprint and adjust finishes. Bring forward a stage of work or defer it.
Clients doing their early homework often also get building cost insights from LowDocLender to compare broad market expectations with project-specific advice.
Common checkpoints at this stage include:
- Scope clarity: What is included, excluded, and awaiting final selection.
- Allowances: Which items are still provisional and what risk sits inside them.
- Programme: How approvals, procurement, lead times, and site start line up.
- Contract setup: Who is responsible for what, and how changes are dealt with if they arise.
A short explainer can also help here before construction begins.
Stage 6 Construction and site management
Once work starts on site, the process becomes very practical. Procurement, sequencing, subcontractor coordination, quality checks, safety, inspections, and client communication all need to run properly.
For renovations and extensions, this stage often reveals hidden conditions in the existing building. That might be outdated framing, drainage issues, termite damage, or inconsistent levels. The advantage of design build is speed of response. The same team can assess the issue, review the design impact, price the change if needed, and keep the job moving with less back-and-forth.
Clients usually judge this stage on three things. Is the site organised, are decisions being handled promptly, and is communication clear?
Stage 7 Handover and post-occupancy
A proper handover is more than keys and a final invoice. It should include inspections, practical completion, defect lists where needed, operating information for appliances and systems, and a clear explanation of what happens next.
Post-occupancy support matters as well. New buildings and renovated spaces settle. Small defects appear. Clients have questions once they start using the space day to day. A builder who plans for that period tends to run better projects from the start, because the standard expected at handover is clear long before the last trade leaves site.
Understanding Project Timelines and Costs
Most clients ask the same two questions early. How long will it take, and how can I stop the budget from drifting?
The honest answer is that every project varies by scope, approvals, selections, site conditions, and complexity. But the design-build model gives better control because time and cost are reviewed while the project is still being shaped, not after the design is fully locked.
According to ALICE Technologies' summary of the Australian design-build process, pre-construction typically takes 1–3 months and design development 3–6 months in the Australian design-build process. The same source states that integrating Building Information Modeling, or BIM, during this phase reduces redesign and rework by 15–20% compared to traditional methods.
Why the timeline is often shorter
The time saving comes from overlap. Parts of the process can progress in parallel instead of waiting for a full baton-pass from one party to the next. While selections are being resolved, the team can also review buildability, procurement risks, and sequencing.
That doesn't mean rushing. It means making informed decisions earlier.
Good programme management isn't about moving fast for the sake of it. It's about removing avoidable stoppages.
How cost control actually works
Cost control in design build is not just a spreadsheet exercise at contract stage. It happens through a series of practical checks:
- Live design feedback: If a detail or material pushes beyond budget, the team can flag it while options are still open.
- Constructability review: The builder can identify labour-heavy details, access issues, or staging complications before they become variation drivers.
- Reduced rework: BIM and integrated coordination help catch clashes and redesign issues earlier.
- Clearer scope decisions: Clients can see the impact of selections before they become expensive late changes.
If you want a broader benchmark view while you're sense-checking budgets, you can get building cost insights from LowDocLender. For project-specific control during design and delivery, a practical guide to construction cost management is the more relevant lens.
Where clients still need to be careful
Even in a good process, delayed selections can affect lead times. Scope creep can still happen. Existing homes can still hide conditions that no one can confirm until demolition starts. Design build reduces volatility. It doesn't eliminate the need for disciplined decisions.
The Templeton Built Approach In Action
Theory matters, but clients usually want to know what the process looks like when it meets a real brief, a real site, and a real deadline.

A renovation with hidden complexity
A common Adelaide renovation starts with a simple request. Open the kitchen, connect better to the outdoor area, add light, and make the home feel larger without losing character.
On site, conditions are usually more layered. Existing walls may carry unexpected loads. Floor levels may not line up cleanly with the extension. Services often need rerouting. In a fragmented process, those discoveries can bounce back to the designer for revision, then back to the builder for repricing.
In an integrated model, the design and construction teams can work through those site findings together. The client gets one response, not a debate between separate parties.
A custom home with strong design intent
Architecturally driven homes demand more than efficient building. They need detailing discipline. They also need someone to keep the project buildable when ambitious ideas meet engineering, procurement, and weather exposure.
That's where joined-up thinking matters most. The design ambition stays intact, but the team can refine materials, sequencing, and junctions before they become site headaches. Instead of cutting design quality late, the process helps protect it through earlier coordination.
The best projects don't come from choosing between design quality and construction practicality. They come from resolving both together.
A developer-led project that needs certainty
Developers usually look at the process differently from owner-occupiers. They still care about design, but they're also measuring approval risk, programme control, and feasibility.
An integrated approach helps because the same team can look at the project from concept through documentation and delivery. That creates a cleaner line between the early numbers and the eventual built outcome. It also reduces the chance that a design evolves in a way that looks attractive on paper but weakens the commercial logic once pricing starts.
How to Choose Your Design Build Partner
Not every firm that offers design and construction runs an integrated process well. Some have the label, but the internal handover is still clunky. Some communicate well during sales and poorly once the project starts. Some design beautifully but don't manage budget pressure with enough honesty.
The right partner should be able to show you how the process works before you sign anything.
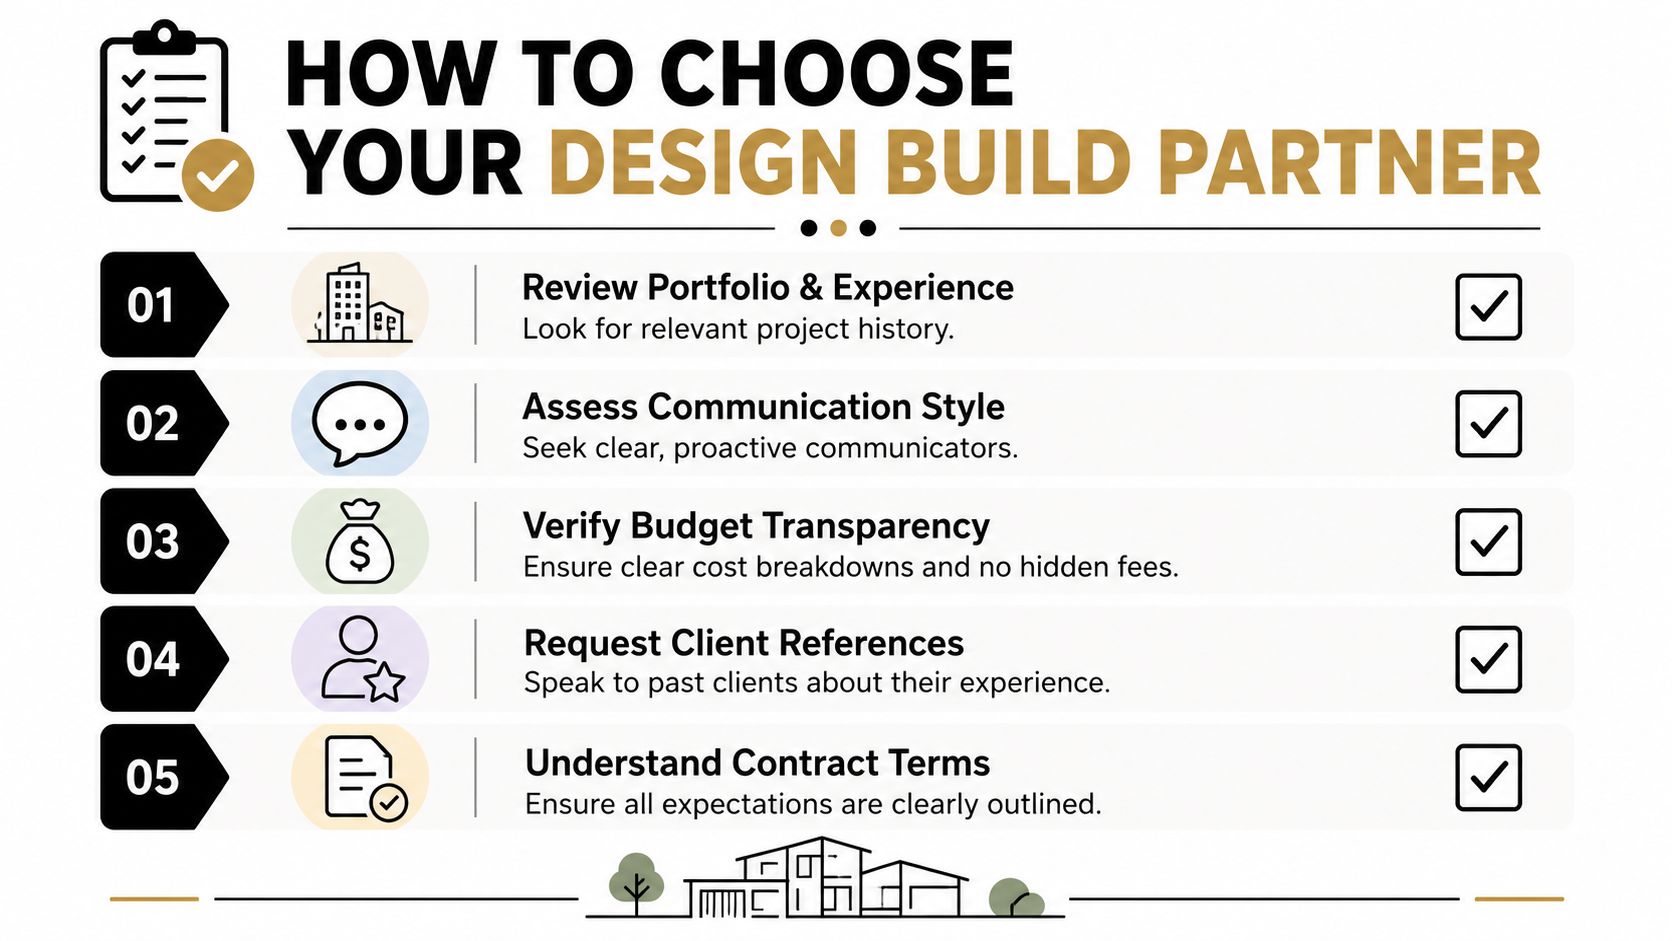
Questions worth asking early
Bring these questions to every meeting, whether you're comparing builders or narrowing a shortlist:
- How do you manage design-to-site communication: Ask who carries the brief from first concept into documentation and then into construction.
- When do you discuss budget realistically: You want evidence of cost feedback during design, not only after drawings are complete.
- Who handles approvals and consultant coordination: Clarify whether the firm leads this or whether you'll be managing pieces yourself.
- How are changes assessed: Good answers cover cost, timing, and design impact together.
- What does client communication look like during construction: Ask how often updates happen and who your point of contact will be.
- Can you show similar project types: Renovations, custom homes, and fit-outs each bring different operational challenges.
What strong answers sound like
A capable design-build partner speaks plainly. They won't promise that every unknown can be removed. They will explain how unknowns are identified, documented, priced, and communicated.
They should also be comfortable talking about trade-offs. If someone only tells you the process is problem-free, stress-free, and always straightforward, be careful. Building isn't always straightforward. Good operators don't hide that. They manage it.
For clients who want to better understand the coordination side, this overview of project management in construction helps frame what a well-run partner should be doing behind the scenes.
Red flags to watch for
A few warning signs come up often:
- Vague pricing language: If inclusions and exclusions aren't explained properly, confusion will surface later.
- Too much dependence on future clarifications: That usually means scope isn't resolved enough.
- No clear lead contact: Clients need to know who is accountable.
- Portfolio mismatch: A firm that mostly builds new homes may not be the right team for a technically messy character renovation.
Choose the team that answers hard questions directly, not the one that makes the process sound easiest.
Start Your Project with Clarity and Confidence
A building project feels far more manageable when design, pricing, approvals, and construction aren't pulling in different directions. That's the value of the design build construction process. It creates one line of responsibility, earlier cost visibility, and a more practical path from concept to completion.
If you're planning a renovation, extension, custom home, or development project, the first step isn't committing to a build. It's getting clear on feasibility, priorities, and process. When that part is handled well, the rest of the project has a much stronger foundation.
If you want a clearer path from first idea to finished build, Templeton Built can help you start with a practical conversation about your site, scope, budget, and the right delivery approach for your project.


Leave a Reply