

Adelaide Extension Design and Build Guide
You bought the house because the location worked, the block had potential, and you could see yourself staying for years. Then life shifted. One child became two. The spare room became an office. The dining table became a workstation, homework desk, and dumping ground for school bags, chargers, and unopened post.
That’s usually the point where homeowners in Adelaide start weighing up the same question. Move, or make the current home work harder.
For many families, an extension is the smarter path. It lets you keep the suburb, the school zone, the backyard, and the street you already know, while reshaping the house around the way you live now. The key is how you approach it. A disconnected process with one consultant drawing plans, another pricing them, and a builder trying to solve the gaps later is where stress often starts. A proper extension design and build process pulls those moving parts together early, when changes are still affordable and decisions are still clear.
Is Your Home Feeling a Little Too Cosy
A lot of extensions start with small frustrations that keep repeating.
The kitchen is boxed in and can’t handle family life. The kids share a room that was meant for one. Someone is taking Zoom calls from the end of the hallway. You walk through the laundry to get to the backyard, and every day you think, this house nearly works.
That feeling is common across South Australia. Demand for more space isn’t imagined. Residential building approvals for alterations and additions reached 12,847 in South Australia in 2022-23, a 15.2% increase from the previous year, according to Australian Bureau of Statistics building approvals data. More households are choosing to improve what they already own rather than start again somewhere else.
Why extensions feel harder than they should
The idea is exciting. The process often isn’t.
Homeowners usually worry about the same things:
- Losing control of the budget: They don’t want a concept sketch that looks great but can’t be built for a sensible figure.
- Getting stuck in approvals: Council rules, engineering, and documentation can feel opaque if it’s your first project.
- Living through the build: People want to know what daily life will be like once work begins.
- Making the old and new parts feel connected: A successful extension shouldn’t look like a room that was bolted on as an afterthought.
The best extensions solve a lifestyle problem first. Extra floor area only matters if the new space changes how the home works day to day.
In Adelaide, local experience matters because the conditions matter. Block shapes vary. Character issues come into play in older suburbs. Access can be tight. Ground conditions can change the structural approach before a slab is even designed.
Templeton Built has been operating in the Adelaide market since 2001, with an in-house design-and-construction model shaped around those local realities. That kind of integrated setup suits homeowners who want one team carrying the job from first ideas through approvals and construction, rather than trying to coordinate separate parties themselves.
What design and build changes
A design and build approach keeps the conversation practical from the start. You’re not just discussing what might look good. You’re also discussing how it will be built, what is likely to affect cost, and which ideas are likely to create approval or construction headaches later.
That changes the tone of the whole project. Instead of chasing drawings first and answers later, you build the answers into the drawings.
From Dream to Blueprint Feasibility and Concept Design
The most expensive mistakes in an extension usually happen before construction starts. They happen when assumptions go untested, when a wish list isn’t prioritised, or when a design is developed without enough regard for site conditions and buildability.
A proper start is quieter than often anticipated. It’s not about dramatic sketches on day one. It’s about sorting the facts.
Start with the block, not the Pinterest board
Your home sits on a real site with real limits. Before anyone talks about raked ceilings, big sliders, or a new parents’ retreat, the first question is whether the block can comfortably support what you want to add.
In Adelaide, soil conditions are one of the first things to test. Due to Adelaide’s reactive clay soils, 85% of extension projects require a geotechnical report during the feasibility stage, as outlined through AS 2870 guidance and ABS defect context. That report helps determine the right footing approach and reduces the chance of structural trouble later.
Reactive clay changes the conversation early. It can affect excavation, footing depth, drainage planning, and structural detailing. If a homeowner skips that step to save time, the project often pays for it later in redesigns or site variations.
What a good feasibility review actually checks
Feasibility isn’t just a box to tick. It’s where a team tests whether your brief, your block, and your budget belong in the same sentence.
A useful review should look at:
- Site constraints: Setbacks, easements, existing levels, access width, significant trees, and how the extension connects to the current structure.
- Planning issues: Whether the house sits in a zone or streetscape context that changes approval risk.
- Structural logic: Whether the existing home can accept new loads easily or needs more intervention.
- Budget alignment: Whether the amount of work matches the level of finish and complexity you’re aiming for.
- Lifestyle fit: How the extension affects movement through the house, privacy, storage, light, and the backyard.
If you want a deeper sense of what sits inside that process, this overview of what a feasibility study covers for a residential project is a useful reference point.
Practical rule: If your brief only lists rooms and square metres, it’s incomplete. A strong brief also explains how you want the house to feel, how you use it on weekdays, and where current friction shows up.
Write a brief that reflects real life
Homeowners often say they want “an open-plan living area” or “a bigger kitchen”. That’s a start, but it isn’t enough to guide a strong design.
A more useful brief sounds like this:
- Morning use: Two people need bench space at once, and school lunches shouldn’t block coffee or breakfast.
- Entertaining: You host family often and want guests to gather around the kitchen instead of splitting into separate rooms.
- Noise control: One person works from home and needs distance from the main living zone.
- Storage: You need a place for bags, appliances, linen, and toys so the new space stays usable.
- Connection outside: You want visual access to the backyard from the kitchen and living area.
These details shape layout decisions better than style words alone. They help a designer know whether the right answer is a rear extension, a side infill, a reworked internal plan, or a staged renovation with the extension doing only part of the job.
If the project centres on the kitchen, it also helps to think through appliance placement, prep zones, pantry needs, and traffic flow before plans advance too far. This guide on how to plan a kitchen remodel is a practical way to sharpen that part of the brief.
What concept design should deliver
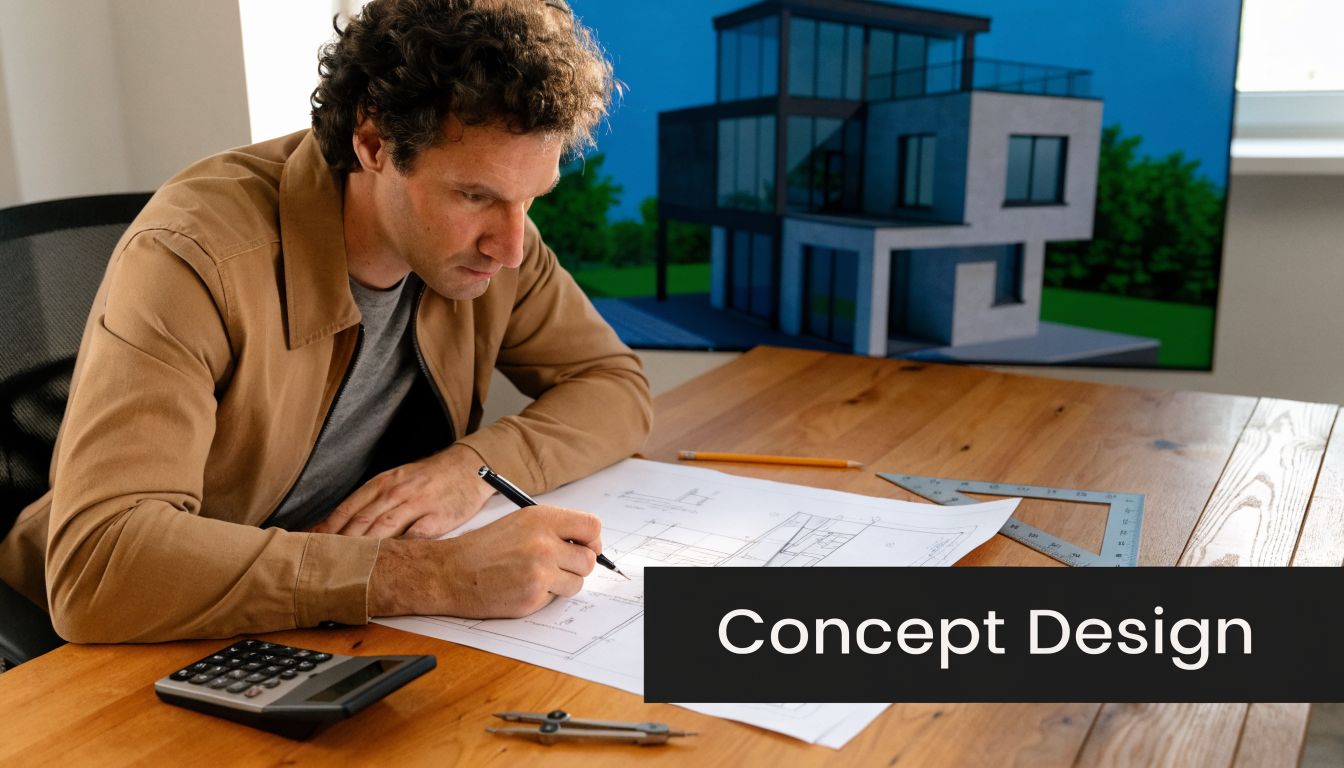
Concept design isn’t final documentation. It’s where broad intent becomes something you can test.
At this stage, homeowners should expect:
- Floor plan options that show room arrangement, furniture logic, and circulation.
- Simple massing or 3D views so you can understand roof form, volume, and how the extension meets the original house.
- Early cost-aware feedback on what parts of the concept are straightforward and what parts introduce complexity.
- A conversation about priorities so the design can be adjusted before too much money goes into detailed drawings.
Not every appealing concept is worth carrying forward. Angled forms, unusual junctions, and dramatic roof lines can work well, but they need disciplined detailing. Cost predictability in those kinds of designs is still one of the least clearly explained topics for homeowners, especially when trying to compare an angular extension with a simpler rectangular form. In practice, the right question isn’t whether a feature looks impressive. It’s whether it improves the way the home performs enough to justify the build complexity.
What works and what usually doesn’t
Some decisions make extension design smoother from the outset.
What works
- Extending where the existing house naturally wants to open up
- Keeping structural spans sensible unless there’s a strong reason not to
- Designing storage into circulation areas
- Resolving floor levels early
- Planning windows around privacy, solar gain, and furniture placement together
What usually causes trouble
- Oversized glazing with no thought to summer heat
- Layouts that produce large expensive openings just to create a visual effect
- Pushing the extension too close to boundaries without checking planning implications
- Treating the original house and extension as separate buildings internally
- Choosing finishes before the floor plan is finalized
A good concept feels calm. It doesn’t need gimmicks. It needs to solve the pressure points that made you consider extending in the first place.
Navigating Budgets and Bureaucracy
A budget usually feels hardest at the point where the drawings look clear but the actual project scope is still forming. In Adelaide, that gap often sits between concept design and full documentation. It is where provisional allowances, consultant fees, approval costs, and hidden work in the existing house start to become visible.
A realistic figure is easier to manage when you can see what is driving it, what is still an allowance, and which decisions will change it.
Rough online rates cause trouble because an extension is rarely just new floor area. The job might include steel to open up the old house, drainage changes, demolition, asbestos handling, matching brickwork, ceiling repairs in retained rooms, and time spent protecting the part of the home you still live in. Those items are common on Adelaide sites and they are easy to miss if you budget from a generic national article.
What actually shapes extension cost
Square metre rates still have a place. They are a screening tool, not a quote.
The biggest cost drivers usually include:
- Access to the site: Narrow side paths, overhead obstructions, and limited room for skip bins or machinery slow production and add handling costs.
- Structural work to the existing home: Beams, lintels, footing upgrades, and temporary support can shift the budget fast.
- Service relocations: Sewer, stormwater, gas, electrical upgrades, and hot water moves often cost more than owners expect.
- Finish level: Cabinetry, windows, flooring, tiling, and bathroom selections can create wide price gaps within the same floor area.
- How well the new work matches the old: Tying roof lines, cornices, floor levels, render texture, and brick bonds together takes labour, and labour is a large part of extension cost.
One point matters more than it gets credit for. A 30 square metre extension attached to a dated kitchen can turn into a wider renovation once walls open up and old services are exposed. That is not scope creep in every case. Sometimes it is the only sensible way to make the extension function properly.
A realistic Adelaide cost guide
For Adelaide budgeting, use local guidance rather than broad Australian averages. The 2024 extension and renovation cost guide from Archicentres gives a stronger starting point for early planning than a recycled national rate, especially if you are still deciding between a modest rear addition and a larger family-room extension.
Using a mid-range allowance for planning purposes, this table gives a practical starting frame.
| Extension Type | Average Size | Estimated Cost per m² (AUD) | Total Estimated Cost (AUD) |
|---|---|---|---|
| Single-room rear extension | 20 m² | 2,500 to 4,000 | 50,000 to 80,000 |
| Open-plan living extension | 30 m² | 2,500 to 4,000 | 75,000 to 120,000 |
| Family room plus utility space | 40 m² | 2,500 to 4,000 | 100,000 to 160,000 |
Use those numbers as orientation only. Soil conditions, structural steel, window specification, and how much of the existing house gets touched will push the result up or down.
If you want a more detailed local breakdown, this guide to house extension cost considerations in Adelaide is useful alongside early sketches and a draft inclusions list.
Value engineering without weakening the result
Value engineering works best when it protects performance and reduces unnecessary build complexity. A good builder will not start by stripping out the items you notice every day. The better approach is to simplify what costs a lot to build but adds little to how the home lives.
That usually means choices like these:
- Simplify roof forms before cutting back room size or ceiling height
- Use fewer custom window sizes instead of reducing natural light across the whole extension
- Keep wet areas close together so plumbing runs stay efficient
- Choose durable standard materials installed well rather than paying for complicated details that do not improve daily use
- Settle the footprint early so the team is not pricing repeated redraws and late structural changes
The right question in a budget review is simple. Which parts make the extension work better every day, and which parts are only expensive to build?
Broader renovation reading can be helpful here, especially if the extension triggers updates in older rooms as well. This practical guide for home renovations is useful for thinking through sequencing, finish priorities, and how one upgrade can affect the next.
The approval side that catches people out
Cost is only half the pressure. Paperwork and approvals are the other half, and they can affect both price and timing.
In South Australia, an extension may require planning consent, building rules consent, structural engineering, site information, energy documentation, and specialist reports depending on the block and the design. A common assumption is that the design is the project. In practice, the lodged documents, consultant input, and approval pathway are what allow the project to proceed lawfully.
Different projects may involve:
| Consultant or party | What they typically handle |
|---|---|
| Designer or draftsperson | Layouts, drawings, documentation package |
| Structural engineer | Footings, beams, lintels, slab and framing details |
| Surveyor or certifier | Building rules pathway and compliance review |
| Geotechnical consultant | Soil classification and footing recommendations |
| Council or assessing authority | Planning pathway where required |
On Adelaide sites, approval delays often come from ordinary issues rather than dramatic ones. The drawings may be missing details. The design may sit too close to a boundary. Window placement may raise overlooking concerns. The owner may change the roof form after engineering has started.
Those are all fixable problems. They just cost time.
The smoothest projects are usually the ones where the designer, builder, engineer, and approval consultant are working from the same set of current documents from the start. That integrated design-and-build approach matters in Adelaide because council expectations, site constraints, and construction pricing all affect one another. When those parts are coordinated early, the budget is clearer, approvals move with fewer surprises, and the build starts on firmer ground.
The Build Unpacked From Foundation to Finishes
The first week on site often surprises Adelaide homeowners. There is noise, fencing, demolition, deliveries, and a lot of checking. Then, for a few days, the place can look as if little has changed. That is normal. Good extension work starts with control, not speed, because the new structure has to tie into an existing home that may still be occupied.
Build time varies with access, structural complexity, weather, and how much of the existing house is being altered. For many Adelaide extensions, the construction phase sits somewhere in the 12 to 20 week range, but that only holds if selections are settled, materials are available, and site conditions are as expected. Extensions are rarely linear. A builder may be solving an old drainage issue, protecting retained rooms, and coordinating live services at the same time.
Site setup and groundwork
Early site work sets the tone for everything that follows. Access paths, temporary fencing, skip placement, material storage, and protection to the existing home need to be sorted before the crew can work efficiently. On a tight Adelaide block, that planning matters even more because one poor delivery plan can slow the week.
Extensions also demand more care than a new build on a clear site. Floors need protection. Dust migration needs managing. Existing services need to stay safe and, in many cases, operational. This guide to site preparation for construction shows the sort of practical issues that get handled before the visible structure goes up.
After that, the job turns to set-out, excavation, and confirming that the site matches the documents. If rock, old footings, undocumented pipes, or tree roots appear, the program can shift quickly.
Foundations decide how the extension performs
Footings do not get much attention from owners because they disappear fast. They still shape the long-term result more than almost any finish.
On Adelaide sites, footing depth and type depend on engineering, soil classification, slope, nearby trees, and how the new work meets the old house. The South Australian government’s building guidance notes that footing systems must respond to site conditions and structural loads rather than follow a one-size-fits-all depth, as outlined on the PlanSA building rules information pages. In practice, that means the footing detail for a rear family-room extension in the foothills can differ materially from one on a flatter coastal block.
A few realities matter here:
- Excavation can expose hidden problems. Old soakage trenches, redundant pipes, buried concrete, and loose fill are common finds.
- Finished floor levels need close attention. A small discrepancy can create an awkward step, ceiling compromise, or drainage problem.
- Stormwater strategy should be resolved early. It is far cheaper to fix falls and discharge paths before slabs, paving, and wall linings are in place.
If the footing stage feels slow, the crew is usually doing the right work.
Framing and getting the shape right
Once the slab or footing system is complete, the extension starts to read properly. Rooms take shape. Ceiling heights become easier to judge. Window openings stop being abstract dimensions and start affecting light, privacy, and furniture placement.
This stage is where a design either holds up in real life or needs adjustment. I have seen openings that looked generous on plan feel tight on site because a beam dropped lower than expected. I have also seen a minor set-out error create a visible misalignment between the old hallway and the new wall line. Those are the details a careful builder checks before plasterboard hides them.
Key checks at frame stage usually include:
- Room proportions and whether furniture will fit as intended
- Alignment between existing and new walls, ceilings, and openings
- Bulkheads and structural beams over kitchens, living spaces, and links to the original house
- Roof junction detailing at connection points, where leaks often start later
- Space for insulation and services before cavities are closed
The embedded walkthrough below gives a useful visual sense of how extension construction unfolds on site.
Lock-up and weatherproofing
Lock-up is the point where the extension starts to feel secure. Roofing, windows, external doors, wall wrap, flashings, and cladding or masonry all need to work together, not just look finished from the street.
That matters in Adelaide because local conditions vary more than many owners expect. A home near the coast needs careful material selection and detailing for salt exposure. A site in the hills may need closer attention to wind, stormwater flow, and bushfire-related requirements depending on location. An integrated design-and-build team should already be accounting for those factors before materials arrive on site, not reacting after installation starts.
Good lock-up work comes down to basics done properly:
- Flashings installed cleanly and in the right sequence
- Windows fitted to suit the wall system
- Moisture control behind cladding or masonry
- Roof drainage connected properly to the stormwater plan
- External materials meeting the existing house in a way that looks intentional
Thermal performance also becomes more tangible at this point. Glazing choice, insulation, shading, and orientation affect comfort every day, especially through Adelaide’s hot summers and cold winter mornings.
First fix, linings, and the hidden trades
Once the shell is weather-tight, attention shifts to the work behind the walls. Electricians, plumbers, mechanical trades, and sometimes data or security contractors all need access before insulation and plasterboard go in.
Visible progress can seem slow during this period, but it is one of the busiest parts of the build. Joinery set-outs are checked against actual wall dimensions. Lighting locations are confirmed on site, not just on paper. Plumbing points are fixed in place. If an owner wants to shift a vanity, move an oven tower, or add power to an island bench after first fix has begun, the cost and delay are usually immediate.
This is also where integrated delivery helps. The same team that developed the design is already checking that services, structure, and finishes still line up with the budget and the intended use of the space.
Finishes and why discipline matters late in the job
It is easy to assume the hard work is over once the structure is standing. In practice, the finishing stage exposes every earlier decision. Poor framing shows up in skirtings and cabinetry lines. Late tile changes affect waterproofing set-out. Delayed tapware can hold up fit-off and push handover.
Finishes stack tightly. Waterproofing has to cure. Tilers need correct substrates. Cabinetmakers need straight walls and confirmed appliance specifications. Painters need dry surfaces and completed trims. One trade slipping can affect three others.
The jobs that close out well usually have three things settled before finishes begin:
- Selections are final
- Lead times for ordered items are known
- The owner is clear on inclusions, exclusions, and any owner-supplied items
A proper handover should feel orderly. Services are tested. Defects are listed and addressed. The site is cleaned. The extension is ready to use, not just ready to photograph.
Choosing the Right Design and Build Partner
Picking the right team matters more than choosing the right splashback tile or tapware finish. A good builder can steer a project through complexity. A poor one can make even a simple extension feel disorganised.
Many homeowners compare builders on price first. That’s understandable, but it’s rarely enough. Instead, the key difference often lies in process, documentation, communication, and whether the team pricing the work has been involved in shaping it from the start.
Why integrated delivery changes the result
The traditional model splits responsibility. An owner engages a designer or architect, completes drawings, then sends them out to builders for pricing. That can work, but it also creates a common problem. The builder inherits decisions they didn’t help make, and the homeowner only discovers the cost impact once the design is already emotionally locked in.
An integrated extension design and build process reduces that disconnect. The people guiding design are also thinking about sequencing, procurement, and construction practicality while the concept is still flexible.
That has a measurable effect on time. A 2024 HIA study found integrated design-build methods accelerate extension project delivery by 20 to 30%, with average Adelaide completion times dropping from 24 weeks to 18 weeks, according to the Housing Industry Association study summary.

That speed isn’t magic. It usually comes from fewer handover gaps, fewer redesign loops, and faster decisions because the same team is carrying knowledge forward.
What to ask before you sign anything
Homeowners don’t need to become construction experts, but they should ask sharper questions. The right answers reveal how a builder operates.
Ask things like:
- Who prepares the design and who manages the handover into construction?
- How are cost checks handled while the design is still evolving?
- What consultant work is included, and what is separate?
- Who deals with approvals and coordination?
- How are variations documented and approved?
- What communication cadence should I expect during the build?
- Can you show examples of extension work similar in age and style to my home?
The quality of the answer matters as much as the answer itself. Clear, plain responses usually indicate a process that’s been thought through.
Red flags worth paying attention to
Some warning signs show up early if you know where to look.
| Sign | Why it matters |
|---|---|
| Vague inclusions | Ambiguity becomes dispute later |
| Pricing with little documentation | The quote may not reflect the real scope |
| No clear approvals pathway | Delays often start before site works |
| Overpromising on timelines | Unrealistic promises usually become rushed execution |
| Poor explanation of site risks | Hidden conditions are part of extension work and should be discussed honestly |
You’re not just hiring trades. You’re hiring a system for making hundreds of decisions without losing control of the job.
For Adelaide homeowners, one practical option is a builder that handles both design development and construction under the one roof. Templeton Built is one example of that model, offering in-house design with residential extension delivery so feasibility, approvals, and buildability can be addressed as one coordinated process.
The partnership should feel steady
A good builder doesn’t just sell confidence. They create it through documentation, timing, and consistency.
You should know who to call. You should know how changes are priced. You should know what decisions need to be made next. If those basics are fuzzy before the contract is signed, they won’t become clearer once demolition starts.
Your Homeowner Checklist and Final Questions
By the time an extension is ready to start, most problems can still be avoided with preparation. The families who cope best during construction aren’t always the most experienced. They’re the ones who make decisions early, clear space properly, and understand where disruption will hit.
Pre-construction checklist
Use this as a working list before site works begin.
- Finalise selections: Confirm tiles, tapware, flooring, appliances, colours, and joinery details before trades are waiting on them.
- Clear access areas: Move furniture, outdoor items, and stored goods away from work zones and access paths.
- Plan temporary living arrangements: Decide whether you’ll stay in the home, and if you do, identify how you’ll manage kitchen, bathroom, laundry, and entry access.
- Notify neighbours: Give immediate neighbours a heads-up about likely start dates, access activity, and noisy periods.
- Protect valuables: Remove fragile items, artworks, and anything dust-sensitive from nearby rooms.
- Sort storage early: Extensions often displace more household items than owners expect.
- Check pets and children routines: Fencing, noise, open trenches, and trade traffic change how the home operates day to day.
- Keep one decision-maker clear: If multiple family members are involved, decide who gives final approval on site questions.
The questions most homeowners ask late
Some concerns only become urgent when the start date gets close. That’s normal.
| Question | Practical answer |
|---|---|
| Can we live in the house during the extension? | Sometimes, yes. It depends on where the work occurs, whether key services stay usable, and how much separation there is between site works and living areas. Rear extensions are often easier to live through than projects involving heavy internal rework. |
| What causes delays most often? | Weather, latent site conditions, slow client selections, and changes after construction starts are the common culprits. Delays often come from decisions made too late rather than from the visible building work itself. |
| How do I stop the extension from feeling tacked on? | Match isn’t the only answer. Proportion, floor levels, light quality, and clean transitions matter more than copying every old detail. The new work should relate to the house, not mimic it blindly. |
| Is bigger always better? | No. A slightly smaller extension with better layout, storage, and natural light often performs better than a larger footprint that creates awkward circulation or eats too much yard. |
| Should I choose dramatic design features? | Only if they improve daily living enough to justify the extra detailing and cost. Features that look strong in renderings can create complexity in construction without improving how the home works. |
| What should I lock in before the build starts? | Layout, structural scope, major finishes, joinery intent, appliance choices, and any item with a long lead time. The fewer open questions at contract stage, the smoother the build usually runs. |
A final way to think about the project
A successful extension isn’t judged by how much new area was added. It’s judged by whether the home works better on an ordinary Tuesday.
Can people move through it without colliding? Is there enough storage? Does the kitchen support family life? Does the new space get the right light at the right time of day? Does the old part of the house still make sense beside the new?
Those are the questions that matter after the dust settles. The best extension design and build projects answer them long before handover.
If you're planning an extension and want a clearer path from feasibility through approvals to construction, Templeton Built provides Adelaide-based design and build services for renovations, extensions, and custom residential projects. A first conversation should clarify the brief, test the site, and show you what’s realistic before drawings and costs move too far.


Leave a Reply