

8 Kitchen Renovation Ideas Before and After: 2026 Guide
At 7 am, the weak points in a kitchen show up fast. One person is making coffee, someone else is packing lunches, a cupboard door blocks the walkway, and the bench space disappears under chargers, bags, and breakfast dishes. That kind of friction is usually a planning problem, not a styling problem.
Good before and after results come from diagnosing the room properly first. The key question is not which tile or door profile looks best. It is what is failing now, what needs to change structurally, and which upgrades will give the strongest return in day-to-day use. That is why this guide works as a project blueprint, not just a collection of reveal photos. Each transformation looks at the starting problem, the building solution, the likely budget pressure points, the timeline, and the ideas you can repeat in your own home.
In South Australia, plenty of homeowners are choosing to renovate rather than work around outdated kitchens. The reason is practical. A well-planned kitchen can improve circulation, add storage where it is needed, reduce visual clutter, and make the rest of the house function better.
Style still matters. It just needs to follow the plan. Before you lock in colours, finishes, or cabinet profiles, it helps to study a guide to elegant kitchen designs and compare that inspiration against your layout, lighting, and budget. If open sightlines and better room-to-room flow are part of your brief, these open-plan kitchen ideas for connected living zones will help you see which changes are cosmetic and which ones need proper structural planning.
1. Open-Plan Kitchen Integration with Living Spaces
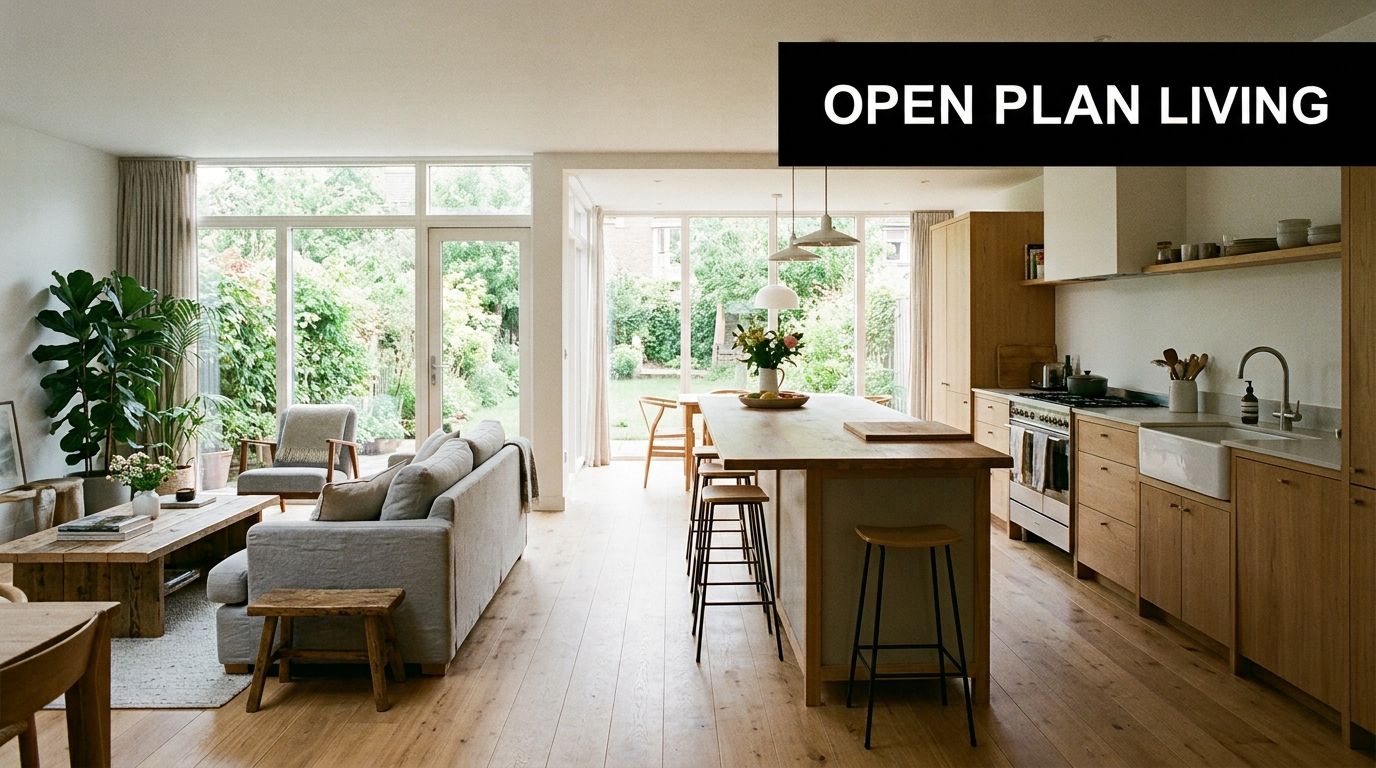
Dinner is on the stove, someone is trying to finish homework at the table, and the person cooking is cut off behind a wall with no sightline to either. That is the problem open-plan renovation solves well. In many older Adelaide homes, the kitchen was designed as a back-of-house workroom. Current family life asks more of it. The room needs to support cooking, conversation, supervision, and traffic flow at the same time.
The best before and after results come from changing how the house works, not just how it looks. Removing a wall can help, but only when the new layout gives each activity a clear place. A proper plan maps the structural constraints first, then sets the kitchen, dining, and living zones so they connect without competing for space.
What changes in the after
A strong open-plan kitchen uses zoning to replace the wall it removed. The island often becomes the working edge of the kitchen. Pendant lighting marks that edge visually, while task lights keep prep areas usable. Flooring changes, bulkheads, or ceiling detailing can separate spaces without closing them off again.
A typical Adelaide example is a 1970s bungalow with a boxed-in rear kitchen and a separate dining room beside it. Remove or widen that dividing wall, add a structural beam if needed, and the house immediately borrows light from the larger shared space. In a Victorian terrace, the smarter move is often more selective. Keep the front rooms intact, open the rear for family living, and let the new kitchen do the heavy daily work without stripping out the character of the home.
There are trade-offs. Open-plan rooms carry sound further, cooking smells spread faster, and clutter is harder to hide. I usually advise clients to budget for better extraction, quieter appliances, and more disciplined storage if they want the room to stay comfortable after the walls come down.
For layout references that show different ways to connect cooking and living zones, review these open-plan kitchen ideas for connected family spaces.
Project blueprint
Problem: Segmented rooms, poor sightlines, weak natural light, and awkward movement between kitchen, dining, and living areas.
Solution: Remove or widen the dividing wall, confirm whether it is load-bearing, then rebuild the layout around an island or peninsula that defines the kitchen boundary.
Budget pressure points: Structural steel, ceiling and flooring repairs where walls are removed, electrical rewiring, and upgraded rangehood ducting.
Typical timeline: Longer than a cosmetic renovation because approvals, engineering, demolition, and patching all affect the program.
Replicable strategy: Keep the working triangle compact, leave at least one clear circulation path that does not cut through the cook zone, and give the island a job beyond extra bench space.
Keep work zones tight: If the sink, cooktop, and fridge are scattered, the room looks open but works poorly.
Use the island with intent: It should define space, provide storage, and allow seating only if circulation still works.
Plan extraction early: In open living areas, a weak rangehood becomes obvious within days.
Resolve finishes after the layout: Matching floor levels, cornices, and ceiling lines often makes the final result feel built-in rather than patched together.
2. Kitchen Modernisation with Appliance and Technology Integration
Not every dramatic kitchen renovation idea before and after needs a structural change. Some of the biggest quality-of-life improvements come from updating old appliances, correcting service positions, and integrating better storage around modern equipment.
A common before condition is a workable layout with dated ovens, loud rangehoods, poor fridge placement, and too few power points. The after version keeps the footprint but makes the room feel current and easier to use. That's often the smarter call when the existing plumbing and gas positions are serviceable.
Where this approach pays off
This suits 1990s kitchens especially well. The cabinets may be tired, but the room proportions are often decent. If you rework joinery around integrated dishwashers, a more efficient oven stack, or a better fridge recess, the kitchen starts functioning like a contemporary space without the cost and disruption of moving everything.
In heritage homes, integrated appliances are often the cleanest answer. They let you preserve the home's character while removing the visual clutter that makes an older kitchen feel patched together. A panel-ready dishwasher, a quieter induction cooktop, and under-cabinet charging points can shift the experience of the room more than a flashy finish package.
Trade-offs that matter
Keeping the footprint usually saves money, but only if the electrical capacity is there. Modern appliances place different demands on the switchboard and cabling than older kitchens did. That's where a “simple appliance upgrade” can suddenly become a compliance job.
Keep services where you can, but don't force a bad layout just to avoid small changes. The cheapest decision upfront sometimes creates an expensive kitchen to live with.
A practical sequence is to finalise appliance models before cabinet shop drawings begin. Miele, Bosch, Smeg, and ASKO all have different dimensions, ventilation requirements, and door swing clearances. If you choose them late, the joinery often gets compromised.
- Buy for your habits: If you batch cook, prioritise oven capacity and bench landing space.
- Check local servicing: A premium appliance isn't much use if warranty support is hard to access.
- Future-proof power: Add charging and appliance points where people use them, not where the old kitchen had them.
3. Bench Top and Storage Transformation
A kitchen can have decent bones and still feel tired the moment you walk in. Usually the problem sits at hand level. Worn benchtops, bulky overheads, dead corners, and cabinets that never held the right things in the first place. Fix those elements well, and the before-and-after difference feels bigger than the square metre count suggests.
This stage of a renovation is where planning matters more than showpiece finishes. I treat benchtops and storage as one job, not two. The surface dictates how you work, and the joinery underneath determines whether that surface stays usable or turns into a dumping ground for kettles, school bags, and unopened post.
What works better than more cupboards
More cabinets do not automatically mean better storage. Better cabinet types do.
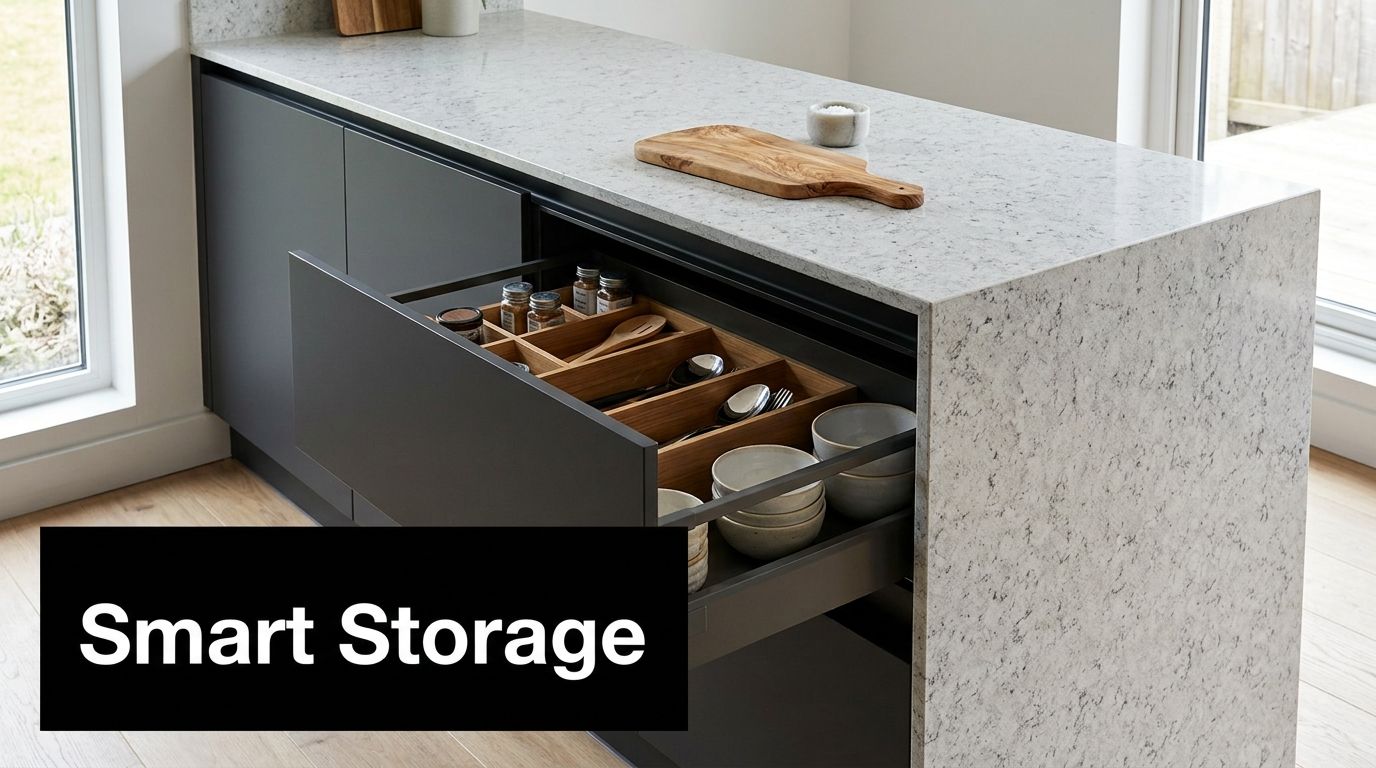
Deep drawers usually beat standard base cupboards because they pull the contents into view. Pots, plates, food containers, and dry goods are easier to reach, easier to sort, and less likely to disappear at the back behind expired packets. In day-to-day use, that saves frustration and reduces bench clutter because people can put things away properly.
A common before-and-after layout replaces a line of overhead cupboards and an awkward corner pantry with full-extension drawers, a single tall pantry, and storage built into the island or peninsula. The room often feels lighter afterwards, but capacity improves because every cabinet is doing a clearer job.
Start with an inventory, not a mood board. Coffee machine, air fryer, lunch boxes, serving platters, bins, recycling, pet food, and cleaning products all need an assigned home before the cabinetmaker draws the first panel.
That is the blueprint approach that gets repeated results. Identify what is failing, choose the right storage type, then size the joinery around real items instead of generic cabinet widths.
Material Choices and Their Trade-offs
Benchtop material affects budget, maintenance, and how forgiving the kitchen feels under daily use. Laminates have come a long way and make sense in many family kitchens because they are cost-effective and easy to live with. Porcelain and quality engineered surfaces give a harder-wearing finish and a cleaner edge profile, but they raise fabrication and installation costs. Timber adds warmth and can look excellent in the right house, though it needs regular care and more caution around sinks and wet zones.
The same logic applies to hardware. Soft-close runners and hinges are not a luxury line item. They are one of the parts you touch every day, and cheaper hardware tends to show wear early through sagging drawers, rough slides, and misaligned doors.
A practical project plan for this kind of transformation usually looks like this: keep the plumbing where possible, rework the lower cabinets into drawers, reduce unnecessary overhead bulk, and spend on the hardware before spending on decorative extras. That balance often gives a stronger result than blowing the budget on a premium benchtop while leaving poor internal storage untouched.
- Design corners with intent: Use them properly with accessible storage, or square them off and spend the money elsewhere.
- Protect landing space: Keep clear bench area beside the sink, cooktop, and fridge so the kitchen works under pressure.
- Make the island earn its footprint: Add drawers, bin storage, or back-facing cabinetry instead of treating it as seating only.
4. Lighting and Ambient Design Enhancement
Some kitchens aren't ugly. They're just badly lit. The before version often has a single ceiling fitting, shadows over prep zones, and no mood once the sun drops. The after version feels calmer, cleaner, and more expensive because the lighting does the heavy lifting.
That change isn't cosmetic. It affects safety, task performance, and how every material reads. A white kitchen under harsh cool light can feel sterile. The same room under warm layered lighting feels welcoming and deliberate.
The lighting mix that changes a kitchen
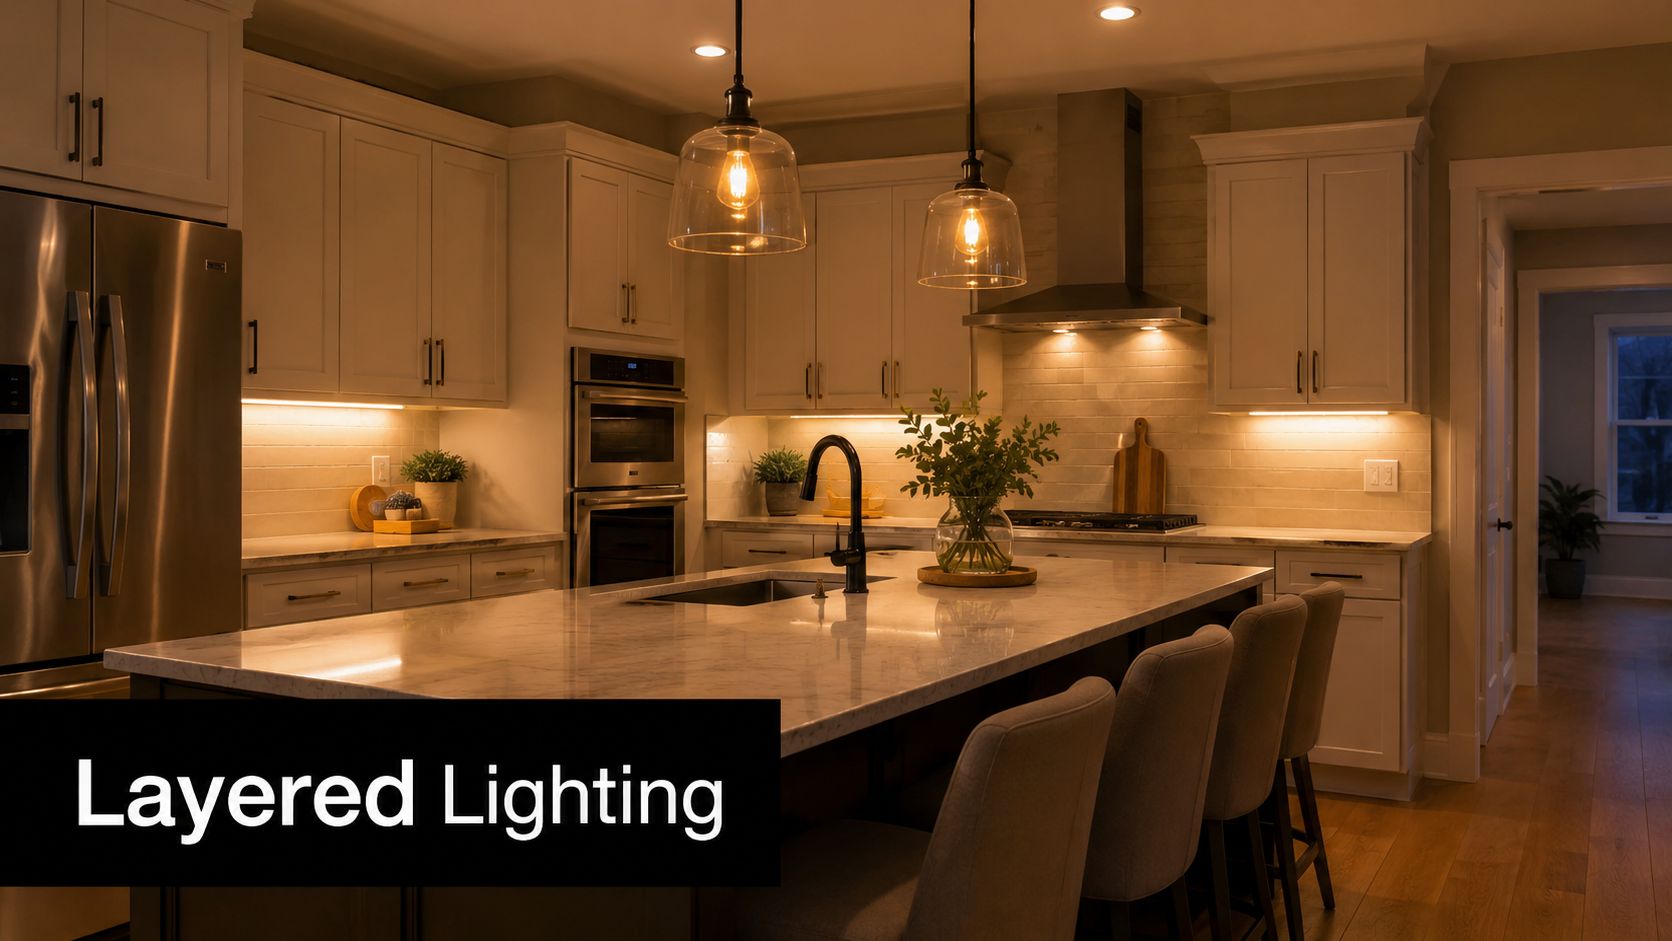
Task lighting belongs over prep zones. Under-cabinet strips are useful because they remove the shadows your own body creates at the bench. Ambient lighting fills the room, and accent lighting gives the kitchen some depth at night, especially in open-plan homes where the kitchen stays visible from the sofa.
Pendant lights over an island can work well, but only when they're scaled properly and set at the right height. Oversized fittings in a compact kitchen can dominate the room. Tiny pendants over a long island often look apologetic and underdone.
A dark kitchen in a period home can improve dramatically with a simple combination of downlights, under-cabinet lighting, and a feature pendant over the island or dining edge. If the renovation includes new joinery, this is the moment to hide drivers, wires, and switching cleanly.
Common mistakes
Lighting plans often get pushed late. That's when you end up with fittings centred on the room rather than aligned to the island, sink, or walkways. In practical terms, the electrician needs the joinery layout early, not after the plaster is done.
Good kitchen lighting should let you chop safely, clean easily, and dim the room for dinner without making the island feel like a stage set.
- Use dimmable fittings: Kitchens now do more than one job.
- Watch reflective surfaces: Glare on polished splashbacks or glossy doors gets annoying fast.
- Add charging points early: Modern kitchens need places for phones, tablets, and small appliances.
5. Backsplash and Finishes Refresh
A full renovation isn't always necessary to get a strong before-and-after result. If the layout works and the cabinets are structurally sound, a finishes refresh can shift the whole kitchen visually. The backsplash is often the most effective place to do it because it sits right in the eyeline and ties cabinetry to benchtops.
Many budget-conscious renovations achieve significant wins. New paint, updated handles, a sharper splashback, and cleaner tapware can make an older kitchen feel intentional rather than tired.
Where to spend and where to hold back
Full-height splashbacks give the cleanest look when the budget allows. They reduce visual interruptions and are easier to wipe down, especially behind cooktops. If that scope is too much, a carefully selected tile with good grout detailing can still transform the room.
A common before condition is plain painted plasterboard behind the bench, dated mosaic tiles, or a short tiled upstand that makes the kitchen feel pieced together. The after version usually looks more resolved because the finishes are coordinated. Hardware, tap finish, grout colour, and wall paint start working as one scheme.
One real Australian example shows how strategic material decisions can keep costs under control. A complete suburban kitchen overhaul was finished for $9,860.08, with the option to reduce the cost to about $6,000 by painting existing benchtops instead of replacing them, as detailed in this budget Australian kitchen overhaul example. That's a good reminder that not every refresh needs a premium stone package to look current.
What usually dates fastest
Busy splashback patterns can age quicker than people expect. So can trend-led handles in a finish that's hard to match later. If you want personality, it's often safer to bring it through elements that are easier to change.
- Coordinate, don't compete: Let either the benchtop or backsplash be the louder surface.
- Seal grout properly: It's a small step that affects maintenance for years.
- Replace hardware at the same time: Old handles against a new splashback can make the update feel incomplete.
6. Kitchen Extension and Space Expansion
You can see the problem before anyone measures it. Two people open drawers and the room locks up. The fridge door blocks the walkway. Laundry traffic cuts through the cooking zone. In that kind of before condition, new doors, benchtops, and appliances will tidy the room, but they will not fix how it works.
That pattern shows up often in Adelaide character homes. The original kitchen was set up as a back-of-house utility room, separated from daily family life. Extending the footprint changes the brief completely. The goal is no longer to fit more into a cramped room. The goal is to build a kitchen, dining, and living zone with enough width, light, and circulation to suit the way the house is used now.
The project plan that makes an extension work
The successful after photos usually reflect decisions made well before cabinetry is selected. Structure, approvals, stormwater, floor levels, and roof junctions all need to be resolved early. If those items are left too late, the kitchen may be larger but still feel awkward, with bulkheads in the wrong place, uneven transitions, or glazing that overheats the room in summer.
The first planning question is simple. Where does the extra area give the best return? A rear extension often makes the most sense on narrow suburban blocks because it improves yard connection and opens the house to northern light if orientation allows. A side return can work well where there is wasted passage space. Some projects need both, but every extra square metre carries structural and envelope costs, so the layout has to earn it.
For homeowners comparing options, these kitchen extension ideas for Adelaide homes show the kinds of footprint changes that can improve flow without overbuilding.
Here's a video that shows the sort of spatial shift homeowners often want from an extension:
Trade-offs that matter on site
Bigger is not always better. A large extension with poor zoning can create long walking distances between sink, cooktop, and fridge, or leave the island acting as a corridor instead of a work surface. I look first at circulation paths, sightlines to the yard, and whether doors and windows can be placed without stealing usable wall space from tall storage and appliances.
Ceiling height matters too. So does floor continuity. If the new slab sits awkwardly below the existing house, or the ceiling drops without a reason, the finished space can feel like an attachment rather than part of the original home. Good extensions read as one composition because the junctions are handled properly.
Budget and timeline reality
Once a project moves from kitchen renovation into extension work, the budget shifts from joinery and finishes to construction fundamentals. Excavation, footings, steel, roofing, insulation, glazing, and external cladding usually account for a large share of the spend. The kitchen fitout still matters, but it becomes one package inside a broader building project.
The timeline changes as well. A cosmetic kitchen update can be staged fairly tightly. An extension usually involves design development, approvals, demolition, structural work, services rough-in, and final fit-off, with weather and site access affecting the program. Homeowners should plan for temporary cooking arrangements and a longer period of disruption.
Expanding the footprint solves crowding. Good planning solves how the room actually works.
7. Colour Palette and Interior Design Coherence
You finish the joinery, install the stone, switch on the pendants, and the kitchen still feels wrong. In practice, that usually comes back to colour and material relationships, not workmanship. A room can be functional and well built but still look disconnected from the rest of the house.
This part of a renovation needs the same discipline as the layout. The useful before-and-after change is not just choosing nicer colours. It is building a palette that ties the kitchen to adjoining rooms, suits the light, and will still read well once the novelty wears off.
In open-plan homes, the kitchen is rarely viewed in isolation. You see the island with the sofa behind it, the cabinetry beside flooring that continues into the living area, and metal finishes against door hardware and lighting elsewhere in the home. If those decisions are made one by one, the result often feels patched together.
A practical way to build the palette
I start with the fixed finishes because they are the hardest and most expensive to change later. Flooring, benchtops, splashbacks, and major cabinetry colours set the baseline. Paint, stools, artwork, and some light fittings can carry more personality because they can be updated without pulling the kitchen apart.
That sequence matters for budget control as much as design control. Homeowners often spend too much time choosing a dramatic wall colour, then discover it clashes with the stone slab they have already paid a deposit on.
A good palette usually has three layers:
- Base tone: the main cabinetry or wall colour, occupying the largest area
- Anchor material: flooring or benchtop that gives the room weight and direction
- Accent finish: timber, metal, tile, or colour used in smaller doses for contrast
What works in real projects
Soft whites, warm greys, muted greens, timber grain, and brushed metal continue to hold up because they are flexible across different house styles. That does not mean every kitchen should be pale. It means long-life palettes usually have enough restraint to sit comfortably with adjacent rooms, existing furniture, and changing trends.
A darker island can work well if the perimeter stays lighter and the room has enough natural or layered lighting. Full dark cabinetry across all walls can look flat in a kitchen with limited daylight. Very bright white can also be a poor choice in rooms that get hard afternoon sun because glare becomes tiring, especially on glossy finishes.
Mid-tone palettes often perform better than they photograph. They hide wear, fingerprints, and minor scuffs more effectively, and they give the room depth without making it feel smaller.
Before and after. The project-plan view
The common "before" problem is visual noise. Yellow-toned flooring, cool white cabinetry, a grey splashback, black handles, and warm pendant lights all competing in one sightline. The room may have decent storage and workable circulation, but it never settles.
The "after" solution is usually tighter editing, not more features. Reduce the palette, repeat key tones, and let one element lead. That might be the benchtop veining, a timber grain in the overhead shelving, or a painted island that connects to furniture in the living room.
For homeowners planning this kind of transformation, the blueprint is straightforward:
- Problem: the kitchen feels separate from the rest of the home
- Solution: choose a controlled palette based on fixed finishes and whole-of-home sightlines
- Budget impact: low to moderate if changes are limited to paint, hardware, lighting, and selected joinery finishes. Higher if flooring and stone are being replaced
- Timeline: a few days for paint and hardware updates, several weeks if cabinetry fronts, splashback, or benchtops are part of the change
- Replicable strategy: sample every finish together in the actual room, under morning, afternoon, and evening light before placing final orders
If sustainability is part of the brief, colour planning helps there too. Keeping the cabinet boxes, repainting sound joinery, and replacing only the most dated visible surfaces often delivers a stronger result than a full strip-out. Templeton Built's guide to sustainable kitchen renovation ideas covers that approach in more detail.
Use bold colour where replacement is cheap. Keep expensive fixed elements calm enough to live with for years.
One strong move is usually enough. A statement splashback, a darker island, or a timber detail can carry the design. Once every surface asks for attention, the room loses coherence.
8. Sustainable and Eco-Conscious Kitchen Features
A sustainable kitchen isn't defined by one recycled product. It comes from a set of decisions that make the room last longer, waste less, and perform better over time. The most effective before-and-after shift is often durability. A kitchen that doesn't need replacing prematurely is already a better environmental outcome.
That means choosing durable materials, designing enough storage to reduce clutter and replacement buying, and selecting appliances that fit the way the household cooks. It also means avoiding trend-heavy choices that feel dated too quickly.
Where sustainability shows up in real projects
Local sourcing helps when available because it can simplify lead times and reduce transport. Low-VOC paints and finishes improve indoor air quality. Integrated recycling and compost storage change behaviour because the system is built into the room instead of treated as an afterthought.
For homeowners exploring that path, Templeton Built's guide to sustainable kitchen renovation ideas is a useful starting point.
The most overlooked sustainable move is restraint. Keeping service locations where practical, retaining sound structural elements, and reusing parts of the existing kitchen where appropriate can all be smarter than a complete strip-out. One Melbourne case study showed that removing a built-in corner pantry and pushing the island bench out by 350mm opened the workspace while keeping plumbing, gas, and electrical services in their original locations, as shown in this Australian kitchen reconfiguration case study. That kind of redesign reduces waste and avoids unnecessary service re-routing.
What doesn't work
Sustainability claims fall apart when homeowners choose fragile finishes that need replacing, or install storage systems they never use. Green choices still have to function well. If they don't hold up to daily life, they won't deliver the long-term result you wanted.
- Prioritise long-life materials: Timeless and durable beats fashionable and short-lived.
- Design waste sorting in from day one: Bins need real space, not a leftover cavity.
- Reuse intelligently: Keep what's sound, replace what's limiting the room.
Before & After: 8 Kitchen Renovation Ideas Compared
| Option | Complexity 🔄 | Resource Requirements ⚡ | Expected Outcomes ⭐ | Key Advantages 📊 | Ideal Use Cases 💡 |
|---|---|---|---|---|---|
| Open-Plan Kitchen Integration with Living Spaces | High, structural work, engineering and DA approvals | High, structural contractors, finishes, extended timeline | Very high, improved light, flow, family connectivity ⭐⭐⭐⭐ | Increases perceived space & resale; modern lifestyle fit | Period homes needing modern flow; families wanting open living |
| Kitchen Modernization with Appliance and Technology Integration | Medium, electrical/plumbing reconfiguration, specialist installers | Medium–High, premium appliances, smart systems, pros for installation | High, immediate functionality, energy savings ⭐⭐⭐ | Convenience, energy efficiency, minimal structural change | Owners wanting tech/efficiency upgrades without layout changes |
| Bench Top and Storage Transformation | Medium, measurement, custom cabinetry lead times | High, premium benchtops, bespoke joinery and install teams | Very high, visual impact and storage efficiency ⭐⭐⭐⭐ | Dramatic aesthetic uplift; better organisation; durable surfaces | Kitchens with worn surfaces or poor storage; value-focused renovations |
| Lighting and Ambient Design Enhancement | Low–Medium, electrical work and control integration | Medium, fixtures, controls, electrician/design input | High, improved usability and atmosphere ⭐⭐⭐ | Cost-effective mood and task improvement; energy-efficient LEDs | Dark kitchens; entertaining spaces; to complement finishes and colours |
| Backsplash and Finishes Refresh | Low, tiling/finish trades, short install window | Low–Medium, tiles, grout, hardware updates | Moderate, strong visual refresh with good ROI ⭐⭐⭐ | Affordable, fast transformation; protects surfaces | Budget-conscious refreshes; short timelines; cosmetic updates |
| Kitchen Extension and Space Expansion | Very High, full build, engineering, DA, council coordination | Very High, construction trades, permits, extended project management | Very high, substantial space increase and long-term value ⭐⭐⭐⭐⭐ | Solves fundamental space limits; large resale uplift; custom design | Homes needing more sqm; growing families; high-budget renovations |
| Colour Palette and Interior Design Coherence | Low, design consultation and specification | Low–Medium, paint, finishes, minor fittings | Moderate, cohesion and perceived quality ⭐⭐⭐ | Affordable way to unify spaces; flexible and reversible | Owners seeking aesthetic unity without construction |
| Sustainable and Eco-Conscious Kitchen Features | Medium, material/spec selection; possible system integration | Medium–High, certified materials, energy-efficient appliances | High (long-term), lower operating costs and health benefits ⭐⭐⭐⭐ | Reduced energy bills; better indoor air quality; market appeal | Eco-conscious buyers; long-term cost reduction; new builds/retrofits |
Your Next Step From Inspiration to Installation
You walk into a kitchen that looked good in a photo, then live with it for a week and notice the deeper problems. The fridge door blocks the main path. The pendant lights leave the prep zone in shadow. The new finishes look sharp, but the drawers still cannot hold the cookware your household uses every day. Good before-and-after projects fix those daily friction points, not just the surface.
The right starting point is a clear brief. Define what is failing now, what has to change, and what can stay. In practice, that usually means ranking the project in order: layout first, then services, then joinery, then finishes. If the room is structurally awkward, spend money on plan and circulation before spending it on splashback tile or tapware. If the layout already works, a bench, storage, lighting, or appliance upgrade can deliver a strong result with less disruption.
This article has treated each renovation idea as a project plan, not a gallery. That matters once quotes start landing. A smart plan sets out the problem, the buildable solution, the likely cost range, the trade-offs, and the timeline. It also shows what can be staged. Some owners need a full strip-out and rebuild. Others get a better return by keeping plumbing points where they are, improving cabinet internals, and upgrading the lighting and finishes around them.
Budget planning needs a buffer, not optimism. Earlier sections covered how costs can swing sharply between a cosmetic refit and a custom rebuild. What often catches owners out are the items behind the walls and under the floors. Older Adelaide homes regularly bring electrical rectification, subfloor levelling, ventilation upgrades, plumbing corrections, or asbestos-related procedures into scope. None of that appears in the hero shots, but all of it affects the final number, the program, and sometimes the design itself.
The sequence matters just as much as the selections.
A kitchen renovation runs better when the scope is documented early, long-lead items are ordered before demolition, and trade access is planned around how the household will function during the works. Appliances, custom joinery hardware, stone, and specialty fixtures can extend timelines if they are chosen late. Clear documentation also reduces variation costs, which is one of the fastest ways a sensible budget becomes an expensive one.
Handover is not the last trade visit. Final detailing, defect checks, appliance commissioning, and proper cleanup all shape whether the space feels finished and ready to use. Practical closeout steps, including these essential post-construction cleanup steps, help turn a completed build into a kitchen that is ready for day-one use rather than another week of dust and snagging.
Templeton Built works with Adelaide homeowners who want the design, budget, and construction reality aligned from the start. That builder-led process helps test ideas against site conditions, council requirements, structural limits, and the way the house is used. The result is not just a better-looking kitchen. It is a kitchen that performs properly, suits the home, and justifies the money spent.
If you're planning a kitchen renovation in Adelaide, Templeton Built can help you shape the brief, resolve the practical constraints, and build a result that suits your home and your lifestyle. Whether you need a careful refresh, a full reconfiguration, or a kitchen extension tied into a larger renovation, their team can guide the project from concept through construction.


Leave a Reply