

Load Bearing Wall Removal: An Adelaide Homeowner’s Guide
You're probably staring at a wall between the kitchen and living area, wondering whether taking it out will finally give the house the flow you want. In Adelaide, that idea can absolutely work, but the job changes the moment that wall is structural. What looks like a straightforward demolition from the room side is often one of the most technical renovations you can do inside an existing home.
Load bearing wall removal isn't a decorating project. It's a structural alteration with approvals, engineering, temporary support, permanent load transfer, and a fair bit of coordination behind the scenes. If you understand that from the start, you'll make better decisions, avoid the usual traps, and budget for the actual scope rather than the fantasy version people talk about online.
Is It a Load-Bearing Wall? First Checks and Red Flags
Most homeowners start with the same question. Can this wall come out, or is it holding up the house? There are clues you can look for before anyone opens a ceiling, but they are only clues. They help you form a sensible first view. They do not replace an engineer's assessment.
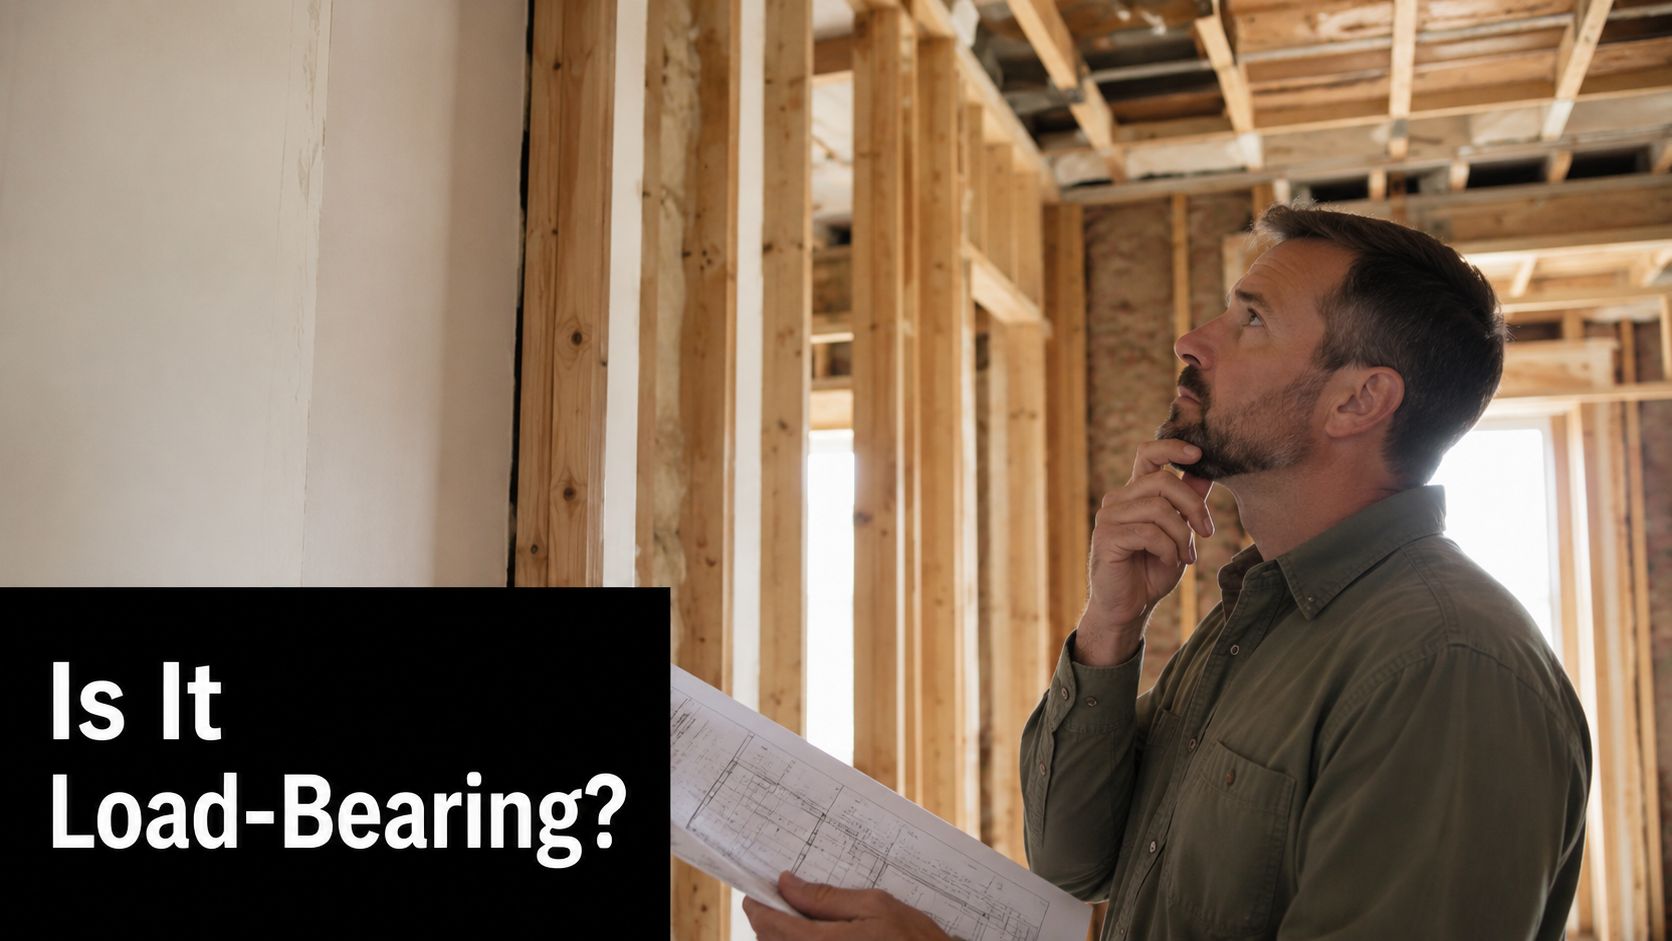
What to look for at home
Walk through the house and look at the wall in context, not in isolation.
- Position in the floor plan. A wall near the centre of the house is more suspicious than a short nib wall at the edge of a room.
- What sits above it. If there's another wall upstairs in the same line, or roof structure bearing over it, that's a red flag.
- What sits below it. In homes with subfloor access, look for supports, beams, stumps, or footings lining up under that wall.
- Length and continuity. A wall that runs a long distance and appears to tie multiple rooms together is more likely to be doing structural work.
- Roof and ceiling clues. If ceiling framing or roof members appear to bear across the wall, treat it cautiously.
A quick visual check can save time, but older Adelaide homes complicate things. Renovations over the years often hide the original structure. A wall may have been altered, thickened, packed out, or partially opened before. That makes guesswork dangerous.
Practical rule: If a wall sits in the middle of the house and lines up with structure above or below, assume it may be load bearing until proven otherwise.
Why this isn't just a renovation choice
In Australia, removing a load-bearing wall is treated as a regulated structural alteration. Under the National Construction Code, structural adequacy must be maintained, so the wall cannot disappear without an appropriate replacement. It must be replaced with a new engineered support system, along with documentation, calculations, and inspection as outlined in this Australian structural guidance.
That's the point many homeowners miss. Once a wall forms part of the load path, the project stops being cosmetic. It becomes a formal structural modification.
If you're still at the sketching stage, it also helps to think about what happens if a post or boxed beam needs to stay visible. Tools that show how to plan around pillars can be useful for testing furniture layouts and sightlines before you commit to engineering.
What doesn't work
A few common assumptions cause trouble:
| Assumption | Reality |
|---|---|
| “It sounds hollow, so it can't be structural.” | Linings tell you very little about the load path. |
| “It's only timber studs.” | Timber stud walls can absolutely carry roof or floor loads. |
| “A builder can tell just by looking.” | A good builder can suspect it. An engineer confirms it. |
| “If my neighbour removed theirs, mine will be the same.” | Framing varies from house to house, even in similar streets. |
If you want a plain-English starting point before calling in the pros, this guide on what is a load-bearing wall is worth reading. It helps homeowners understand the difference between a partition and a structural wall without oversimplifying the risks.
Assembling Your Professional Team in Adelaide
Once a wall looks suspicious, the DIY part is over. This job needs three people on the same page. The engineer, the builder, and the certifier each solve a different problem. If one is missing, the project usually slows down, becomes riskier, or both.
The engineer does the structural thinking
The structural engineer works out how the house currently carries load and how it will carry load after the wall is removed. That includes the replacement beam, end-bearing details, and the support points that receive the transferred weight.
In practical terms, the engineer is answering questions like these:
- What is the wall supporting now.
- Will the opening need LVL or steel.
- Where do the beam reactions land.
- Are the supports at each end adequate.
- Does the floor or footing below need more work.
That design work is what turns a renovation idea into something buildable and approvable.
The builder controls the risk on site
The builder's job isn't just to knock the wall down. The builder sequences the work so the structure stays stable at every stage. That means organising demolition, temporary shoring, carpentry, steel or LVL installation, service disconnection, plaster repairs, and the final make-good.
A good Adelaide builder also knows the local rhythm of these projects. Some homes have brittle old plaster that cracks easily. Some have legacy wiring where nothing is exactly where you expect it. Some have previous works hidden above the ceiling that only show up once the linings come off.
The safest projects are the ones where the engineer's details and the builder's method match from day one.
The certifier keeps the project compliant
In South Australia, structural alteration work typically runs through a building approval pathway under the Building Code of Australia and National Construction Code framework. The certifier reviews the submitted documentation and checks that the proposed work complies before construction proceeds. Depending on the project, this may involve council processes, a private certifier, or both as part of the approval pathway.
That independent compliance step matters. It protects the homeowner as much as anyone else.
Questions worth asking before you engage anyone
Don't hire on confidence alone. Ask direct questions.
- About local experience. Have they handled structural openings in Adelaide homes similar to yours.
- About documentation. Will they provide clear engineered details and a defined scope for approvals.
- About temporary support. How do they plan to prop the structure before any cutting starts.
- About hidden conditions. What happens if they uncover old services, damaged framing, or footing issues.
- About coordination. Who is managing the engineer, certifier, and finishing trades.
The wrong team treats load bearing wall removal like a carpentry task. The right team treats it like a controlled structural change with a finish line that includes compliance, not just a bigger room.
The Engineering, Design, and Council Approval Path
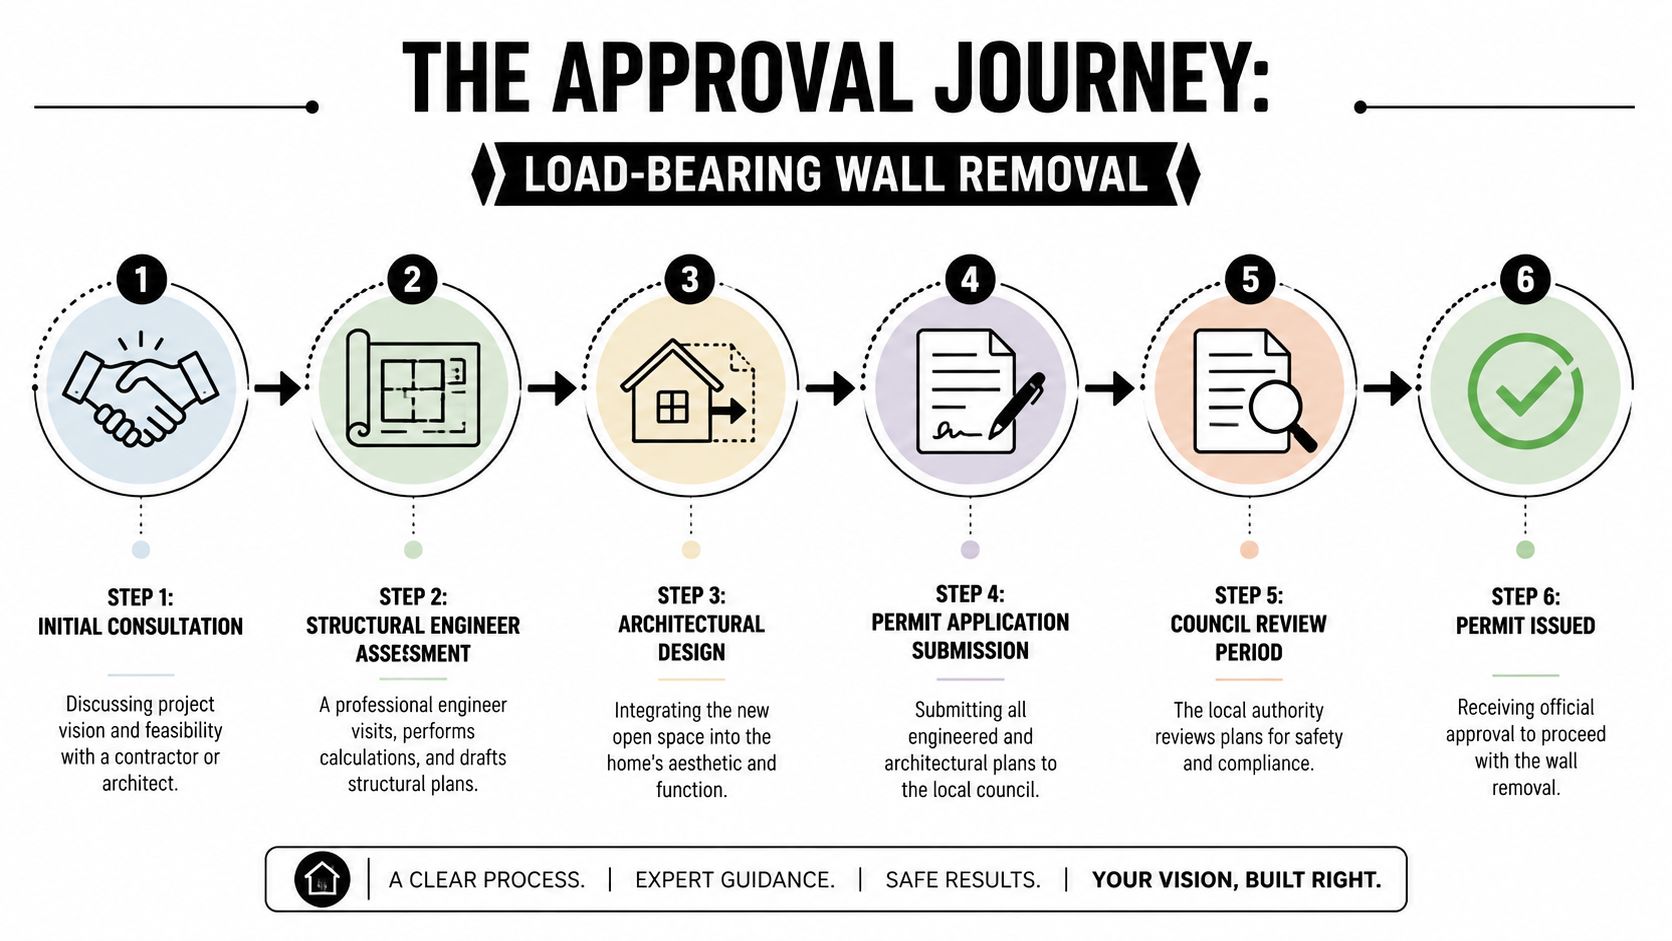
The paperwork stage is where the project either becomes clear or starts drifting. In Adelaide, clean approvals usually come from clear information. That means the engineer, builder, and certifier each have enough detail to assess the work before demolition starts.
What the engineer actually delivers
The first site visit is rarely dramatic. It's careful, methodical work. The engineer looks at the roof or floor structure, checks what bears on the wall, identifies likely load paths, and assesses the support conditions at each end of the proposed opening.
From there, the engineer typically prepares documentation that covers:
- Beam selection. Replacement members are commonly specified as LVL or steel beams sized to suit the span and the loads they need to carry, based on Australian building practice guidance.
- End supports. King studs, jack studs, and the bearing arrangement under the new beam.
- Connection details. Structural connectors such as straps or hangers where required.
- Notes for sequencing. Enough information for the builder to install the new load path correctly.
The beam is only part of the story. A neat drawing of a steel or LVL member means very little if the support points underneath can't safely receive the concentrated load.
Why older Adelaide homes need a footing check
This is the part generic renovation advice tends to skip. A key consideration in older Australian homes is whether the foundation can handle the new concentrated loads from support posts. The project's feasibility may hinge on whether the existing slab or footings are adequate, or if subfloor or new pad footing work is required to safely transfer the load, as discussed in this Australian foundation-focused demonstration.
That issue comes up often in older Adelaide houses with mixed construction history. You might have solid masonry in one area, timber floors elsewhere, old patchwork footings, or previous additions that changed how the house behaves. If the new beam loads land in the wrong place, the engineer may require localised strengthening before the opening proceeds.
A beam can be perfectly sized and still fail as a solution if the load has nowhere reliable to go at the ends.
How the approval path usually works in Adelaide
The process is less mysterious when you break it into practical steps.
Site review and concept confirmation
The proposed opening is checked for basic feasibility. During this process, hidden complications first show themselves.Engineering documentation
The structural design is prepared with beam, support, and load-transfer details.Submission for approval
The prescribed documents are lodged through the relevant approval pathway.Clarifications if required
Sometimes additional notes, revised details, or supporting information are requested.Approval issued before demolition
No cutting should begin until that approval side is settled.
For homeowners who want a better sense of how the structural side fits into a renovation, this explanation of what is structural engineering gives useful context without drowning you in jargon.
What works is a tidy package with coordinated details. What doesn't work is trying to “work it out on site” after the plaster is down.
Safely Removing the Wall and Installing the New Beam
The on-site phase often leads to expectations of excitement. In truth, the best structural jobs feel controlled and slightly boring. That's a good sign. Every step follows a sequence because the house must stay supported the entire time.
Before demolition starts
The room gets protected first. Floors are covered, dust control goes in, and the team isolates any services running through the wall or ceiling zone. That can include power, plumbing, gas, data, or redundant lines left over from earlier renovations.
In older homes, there's another issue to deal with before anything gets disturbed. If the house contains suspect materials from earlier building eras, that needs checking and handling properly. Homeowners planning broader internal demolition should understand the risks around asbestos removal in Adelaide before opening walls and ceilings.
Temporary support is the critical stage
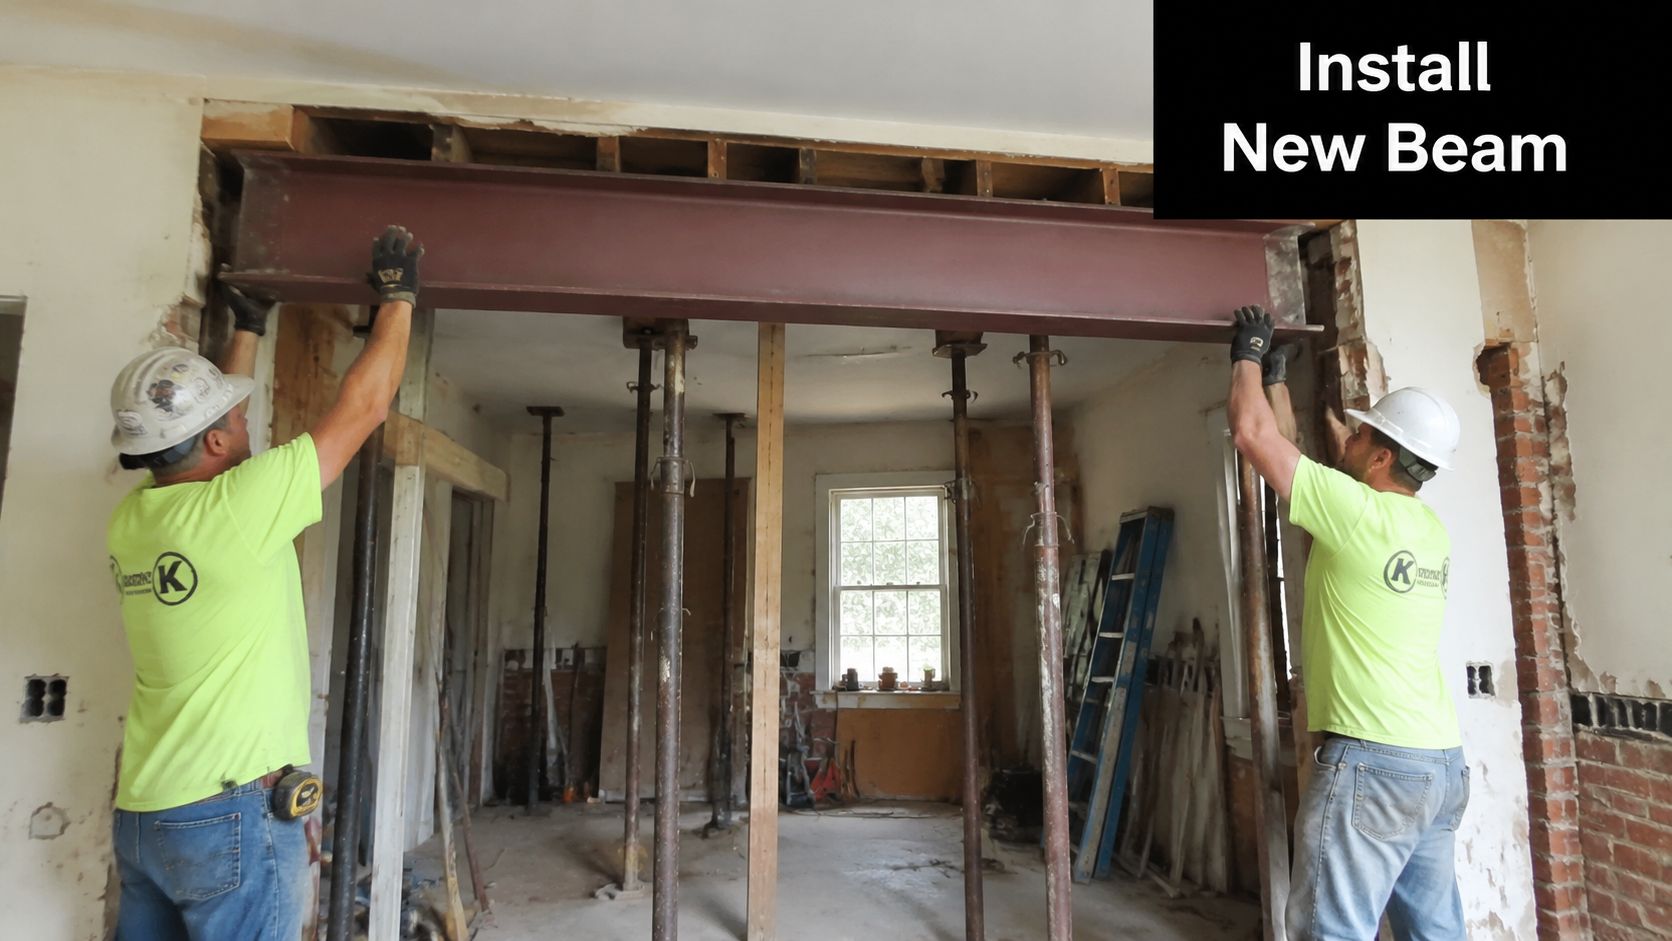
The most failure-prone step is temporary support. In South Australia, industry guidance specifies creating temporary shoring walls or using adjustable steel posts to transfer the load before studs are cut, with the permanent beam installed on king and jack studs before shoring is removed, as outlined in this South Australian engineering guide.
That sequence matters because once the studs in the original wall are cut, the old load path is gone. If temporary support isn't in place, the structure has nowhere safe to send that weight.
A typical site sequence looks like this:
- Set out the opening. Mark exactly what stays and what goes.
- Build temporary shoring. Install support walls or adjustable steel posts with continuous support at the top.
- Check bearing points. Confirm where the new beam ends will land.
- Only then begin removal. Linings come off first. Structural members are cut last.
If the propping looks improvised, stop the job. Temporary support should look deliberate, straight, and over-prepared.
Demolition and beam installation
Once the structure is properly propped, the team strips the wall carefully rather than smashing through it. That gives a clean view of framing, services, and any surprises. The old studs and plates are removed in sequence, not randomly.
Then the permanent support goes in. Depending on the design, that may be an LVL beam or a steel beam. It's lifted into place, seated properly at both ends, checked for level, and fixed to the new support framing.
The end supports are just as important as the beam itself. If the beam lands on poorly prepared studs, out-of-plumb supports, or inadequate bearing, the load won't transfer evenly.
Here's a useful visual of the process in action:
What goes wrong on rushed jobs
A few site mistakes cause most of the ugly outcomes homeowners notice later.
| On-site mistake | Likely result |
|---|---|
| Temporary supports removed too early | Ceiling sag, cracking, movement |
| Beam not fully seated at the ends | Uneven load transfer |
| End supports out of plumb | Twisting or settlement at the opening |
| Services cut without planning | Delays, rework, safety issues |
| Opening set out incorrectly | Poor finishes and awkward beam position |
Australian step-by-step guidance on this kind of work emphasises the same basic order every time. Isolate services, strip finishes, install shoring, remove the wall, set the beam, plumb and fasten the end supports, and only remove temporary walls after the new load path is verified. Builders ignore that order at their own peril.
What works is patience. What doesn't work is trying to save half a day by skipping setup.
Project Costs, Timelines, and Finishing Trades
The numbers hold significance, but they need context. A lot of online advice treats wall removal like a demolition line item. That's misleading. The structural version is more expensive because it's not just about taking something out. It's about replacing what that wall was doing.
The main cost difference
Australian industry cost breakdowns place non-load-bearing wall removal at roughly $300 to $1,000, while load-bearing wall removal sits at about $1,200 to $10,000, with the higher cost reflecting engineering design, temporary supports, beam installation, and trade coordination according to this Australian cost guide.
That spread is wide for a reason. Some openings are straightforward. Others trigger service relocations, plaster repair, flooring patching, joinery changes, or foundation work.
What pushes the price up
A builder usually prices this work by complexity, not by the simple fact that “a wall is coming out”. Key variables include:
- Span of the opening. Larger openings usually need more substantial support.
- Beam type and handling. LVL and steel each bring different site demands.
- Access inside the house. Tight hallways, finished floors, and occupied homes slow everything down.
- Services in the wall. Electrical, plumbing, and gas all add coordination.
- Ceiling and floor make-good. The structural work can be the easy part. Matching old finishes is often harder.
- Support conditions below. If new point loads require extra work underneath, the budget changes quickly.
A cheap structural quote often means one of two things. The scope is incomplete, or the risks haven't been priced yet.
Timelines in the real world
The physical beam installation is only one slice of the project. Homeowners often focus on the day the wall comes down, but the full job includes planning, approvals, ordering materials, site prep, structural work, inspections where required, and finishing trades.
A typical program often unfolds like this:
| Stage | What happens |
|---|---|
| Planning and design | Site checks, engineering, scope definition |
| Approval phase | Documentation lodged and reviewed |
| Pre-start coordination | Trades booked, materials ordered, protection planned |
| Structural works | Propping, demolition, beam install, framing |
| Make-good works | Plaster, cornice, flooring, painting, electrical fit-off |
The finishing side is where expectations need managing. Once the structural opening is complete, the home still needs to look intentional. That may involve plaster patching, cornice replacement, floor infills, skirting, paint, and reconnecting or relocating services. If kitchen joinery or lighting plans change because of the new opening, those trades follow too.
Some homeowners also use the moment to review broader spending priorities. If that's you, a practical piece on home updates without breaking the bank can help separate worthwhile extras from things that can wait.

The projects that stay on track are the ones where the structural work and the finish work are budgeted together. The ones that blow out usually budget for the beam and forget the room has to be put back together afterwards.
Your Guide to a Successful Structural Renovation
Load bearing wall removal can completely change how a home feels. It can improve sightlines, connect living zones, and make an older layout far more functional for modern family life. But it only works when the structural side is treated with the respect it deserves.
The safest mindset is simple. Assume nothing. Verify everything. If a wall might be structural, get it assessed properly. If the opening needs a beam, make sure the supports and the footing conditions below have been considered as carefully as the span above. If approvals are required, get them in place before demolition begins.
The job itself is a chain of dependencies. Engineering informs approvals. Approvals inform construction. Construction depends on temporary shoring, correct beam installation, and disciplined sequencing. Finishes only look good when the structure underneath has been handled properly.
That's why this isn't a weekend DIY task or a shortcut renovation. It's a managed structural project. When the engineer, builder, and certifier each do their part, the process feels orderly and the result feels effortless. When one part is skipped, the house tells you quickly through cracking, movement, delays, or compliance headaches.
If you're planning an open-plan renovation in Adelaide, start with a proper assessment and a clear scope. That's what turns a risky idea into a successful structural renovation.
If you're considering Templeton Built for load bearing wall removal or a wider renovation in Adelaide, the best first step is a conversation about your home, your layout goals, and the structural realities behind them. A good team can help you assess feasibility early, coordinate engineering and approvals, and deliver the finished space without guesswork.


Leave a Reply