

Specification Writing Guide for Construction Projects
You can have a beautiful set of drawings and still end up with a messy build. A client says the bathroom vanity should be “timber look”, the builder orders a product that seems right, and then the finish clashes with the joinery sample the designer had in mind. Nobody is acting in bad faith, but the project still pays for the gap between what was imagined and what was written.
That gap is why a strong specification writing guide matters on real projects. Drawings show where things go and how big they are. The specification states what each element is, how well it must perform, and which requirements the contractor has to meet before the work is accepted. In Australian construction and procurement, guidance from the Northern Territory and Queensland governments treats clear, concise, well-structured requirements as a practical control, not a stylistic preference, because it reduces ambiguity and helps everyone read the scope the same way (Northern Territory specification writing guide).
The best project outcomes start when the spec and the drawings are treated as one coordinated package. If you want a useful companion to this guide, the project brief should already be locked in before you get too deep into product choices, and this overview of the design brief process is a good reference point: What is a design brief and why your project needs one.
Why Your Project Needs More Than Just a Blueprint
A blueprint can show a carpenter where a wall goes, but it will not always say whether that wall needs acoustic insulation, a fire-rated lining, or a specific moisture-resistant board. That gap is where disputes begin. On renovations and custom homes, clients often assume something is obvious, while the builder can only price and build what is written down.
A specification turns those unwritten expectations into a clear instruction set. It defines the materials, workmanship, performance, and acceptance requirements in one place, so the builder, designer, and client are working from the same document. That matters because problems on site usually come from mismatched documents, not from the drawing set alone.
The spec fills the gaps drawings can't cover
Drawings answer geometry. The specification answers quality, product intent, installation standard, and acceptance. If you have ever seen a finish selection go wrong because the drawing said “timber veneer” and nothing else, the problem is easy to spot. The builder had to guess at the exact product family, edge detail, or performance level.
A good spec does not micromanage every trade. It removes the assumptions that cause arguments later.
That practical value shows up quickly on site. A clear spec helps the tenderer price the same scope, gives the site team a measurable target, and gives the client a document to point to when substitutions are proposed. A specification is not just paperwork, it is the job's working script, and it should sit alongside the drawings and schedule as part of one coordinated package. If you are still shaping the brief, start with the design brief process before product choices start to drift.
What good looks like on site
In practice, a strong specification supports three outcomes. First, it reduces scope creep because the builder can see what is included. Second, it reduces delays because product expectations are clearer before ordering starts. Third, it gives you a cleaner basis for assessing variations, because the original obligation is visible in writing.
The purpose of a construction specification is to line up the client, designer, and builder before work begins. If the blueprint is the picture, the specification is the instruction manual that keeps the picture buildable and helps prevent the most common on-site disputes.
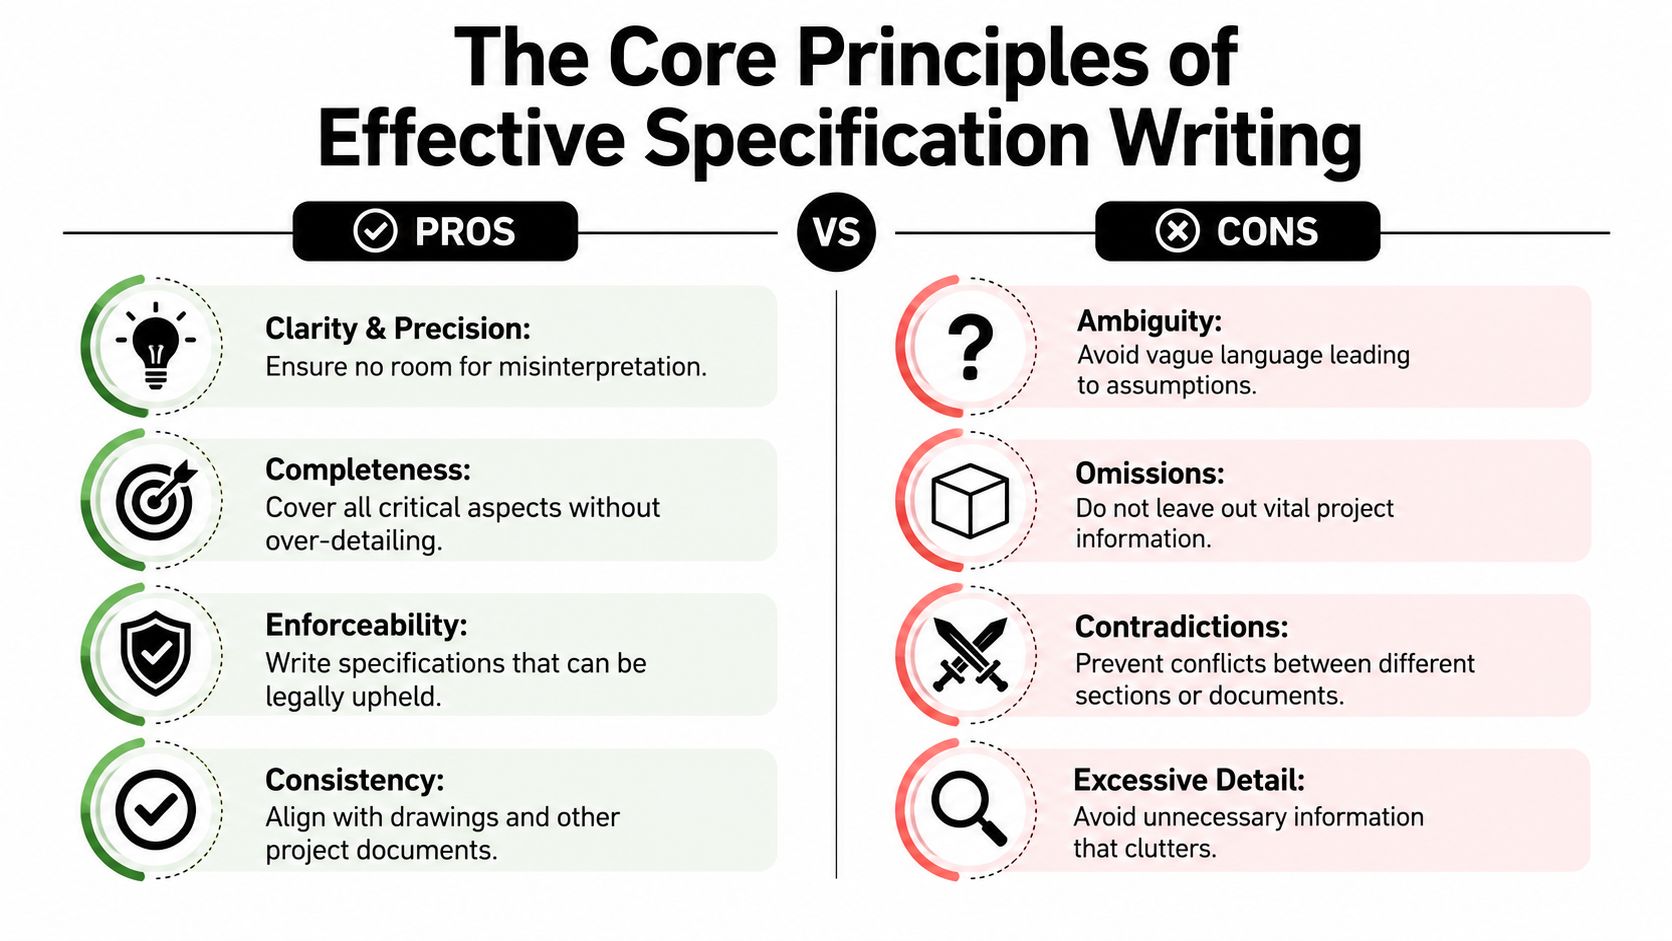
The Core Principles of Effective Specification Writing
A spec that sounds polished can still fail on site if no one can use it quickly. In residential and small commercial work, the better documents are plain, ordered, and easy to compare with the drawings. The practical standard is simple, concise requirements, no repeated wording, numbered sections and paragraphs, and a review by someone who has not seen the draft before it is issued.
Clarity beats clever wording
Clarity means a builder can read a sentence once and know what is required. It does not mean writing like a textbook. Use direct language, name the correct component, and strip out filler that leaves room for argument later. Keep the wording focused on the actual decision the site team has to make, especially where the spec has to sit alongside drawings and schedules without creating a second interpretation.
Conciseness protects the job
Concise writing is not about leaving things out. It is about removing repeated instructions that later clash. If the same requirement appears in more than one place, one copy often gets changed and the other stays behind. That is how a project ends up with two versions of the same expectation, and that is exactly the sort of mismatch that causes avoidable site disputes.
Shorter, tighter language also makes coordination easier. The builder can check the spec against the drawings and schedule without hunting through the document for the same instruction in a different section. That matters when substitutions are proposed, because the original requirement is easier to verify and easier to enforce.
Consistency keeps the whole document usable
Consistency means the spec, drawings, finishes schedule, and consultant notes all use the same names and the same hierarchy. If a room label, product code, or finish description changes from one document to another, the site team has to stop and guess which version controls the work. That slows down pricing, ordering, and approvals.
Australian practice also expects local classification and standards frameworks to be recognised, including formats such as NATSPEC and Surespec, with only relevant, current standards listed, as set out in Northern Territory specification writing guide, Queensland procurement guidance, and Australian specification basics. That is not paperwork for its own sake. It keeps the document enforceable, easier to administer, and easier to line up with the rest of the contract set.
Practical rule: if a requirement cannot be checked on site, rewritten by a contractor, or compared to a sample, it probably is not written well enough yet.
The strongest specs also focus on performance, not just products. A named product is useful when selection is critical, but many requirements are better written as outcomes, tolerances, or workmanship standards. That gives the builder enough direction to price correctly while still leaving room to coordinate the specification with drawings and schedules in a way that prevents the usual on-site arguments.
Essential Sections for a Complete Specification Document
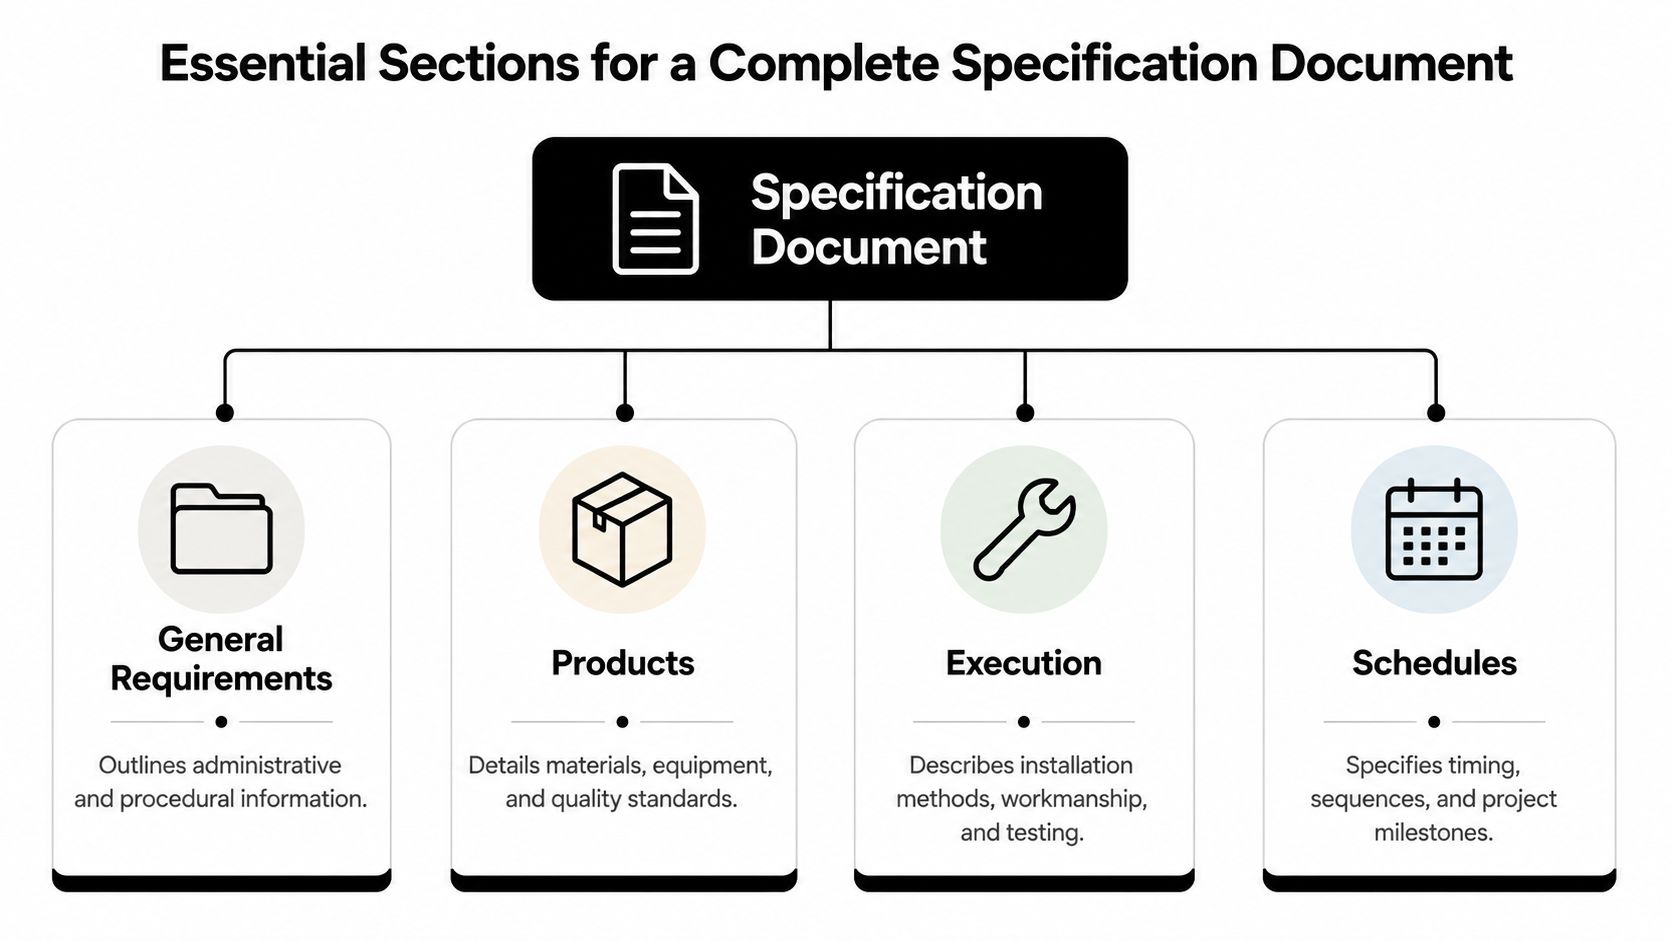
A working specification does not need to be oversized, but it does need a clear order. If the document reads like a pile of notes, the site team will miss things, price risk into the job, or make assumptions that later turn into disputes. The safest structure is to move from project rules, to products, to execution, then finish with schedules so each part of the build can be checked in the right place.
The image below shows the basic hierarchy that keeps the document readable.
General requirements set the rules of the project
This section carries the administration and procedural basics. It should cover who provides what, submittals, approvals, warranties, access constraints, and any project-specific obligations that affect pricing or delivery. If the builder has to guess how a sample approval works, or whether an alternative product needs written consent, the specification has left a gap that will show up on site.
Products define what gets installed
Product sections should identify the required material, fixture, or system in enough detail for pricing and procurement, without filling the page with repeated manufacturer language. That usually means the product name where selection matters, the acceptable performance standard, and any finish or configuration that changes the result. If a product affects appearance, durability, or compliance, it belongs here. For a practical example of how this sits inside the wider document set, refer to Templeton Built's scope of work guide, which shows how scope and specification need to line up before work starts.
Execution explains how the work is delivered
Execution covers workmanship, installation, testing, and any on-site tolerances that matter. This section sets the quality bar for the trade with language that can be checked, not vague phrases like “to a high standard”. The point is to make the required result clear without trying to micro-manage every move on site. That balance matters when the builder, subcontractors, and consultant all need to work from the same document.
Schedules keep selections organised
Schedules are where finishes, fixtures, and repeated selections stay visible in one place. They reduce clutter in the body of the specification and make it easier to spot clashes between design intent and supplier availability. If the schedule lists one tapware finish and the product section lists another, the document has already started to fail.
A useful way to keep those sections workable is to stick to recognised Australian frameworks and current standards only. List only relevant standards, identify mandatory standards in their current version, and keep the specification focused on the documents referred to in the text.
A complete specification does not feel busy when it is organised properly. It feels predictable, and that is what helps the site team, the estimator, and the client work from the same set of expectations.
Determining the Right Level of Detail
The hardest part of specification writing is not adding detail. It's knowing which detail helps the project. Over-specify and you can push tender cost up and increase variation risk. Under-specify and you create ambiguity and rework. Construction guidance is blunt about that trade-off, and recommends just enough specificity, backed by explicit performance criteria and approved alternatives (Deltek specification writing guidance).
Use prescriptive wording where the choice matters
Prescriptive language is appropriate when the product directly affects appearance, compatibility, compliance, or the client's design intent. That might be a particular tapware range, a benchtop finish, or a door hardware set that has to match across the home. If the wrong substitute would compromise the project, the spec should be direct.
Use performance wording where the outcome matters more than the brand
Performance wording works better when the builder can choose the exact product as long as the result meets the requirement. That suits many lining systems, paints, membranes, and fixing methods. In these cases, the spec should define the standard, not over-police the means.
The balance changes by item
| Item | Under-Specified, High Risk | Well-Specified, Balanced | Over-Specified, High Cost |
|---|---|---|---|
| Flooring | “Timber look flooring” with no product class, wear expectation, or installation note | Material type, finish, and performance expectation clearly stated | Exact product, colour, underlay, and installation detail locked down without room for approved alternatives |
| Paint finish | “Premium finish” with no sheen level or location scope | Finish type, location, and acceptance standard named | Multiple brand references and redundant wording repeated across sections |
| Shower waterproofing | Vague language with no testable requirement | Clear performance expectation and relevant standard referenced | Excessive method detail that duplicates the trade's own installation instructions |
The point isn't to write less. The point is to write only the detail that protects the project. For a scope summary that helps anchor these decisions, this guide to the scope of work is a useful companion because the scope and the specification need to reinforce each other, not compete.
If a builder can't tell whether the document is giving them freedom or a fixed instruction, the wording needs another pass.
The best specs give enough certainty to price accurately, but not so much rigidity that they block good alternatives. That's the line worth protecting.
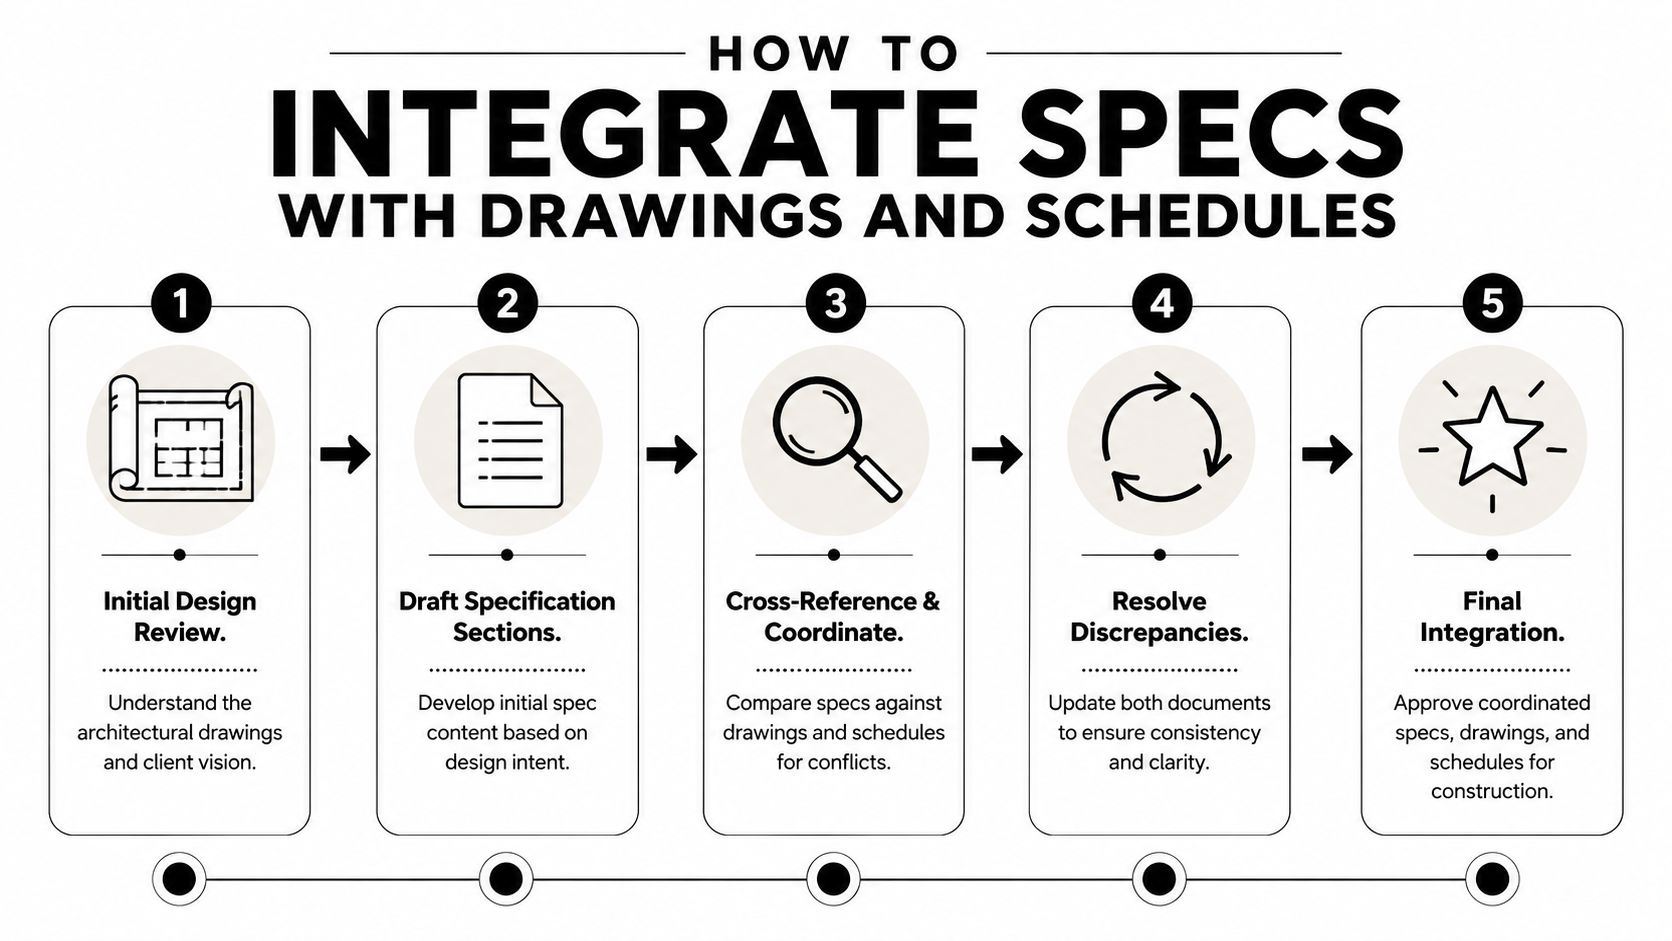
How to Integrate Specs with Drawings and Schedules
Most disputes start when three documents describe the same item in different ways. A wall is drawn one way, the finishes schedule names another product, and the specification still carries copied manufacturer text that was never trimmed back for the project. That mismatch is where site arguments begin, because the builder is left trying to reconcile three versions of the same decision.
Start with the drawings, then test the text
Start by reading the drawings as if you were pricing the job for the first time. Then check every selection in the specification against those sheets. If a product is drawn, labelled, or scheduled, the spec needs to describe the same thing in the same terms. If it does not, the issue should be corrected before the documents go out.
The quickest way to spot a mismatch is to compare the spec against how to read architectural drawings at the same time. That keeps the review grounded in what will be built, not just what sounds tidy on paper.
Use naming conventions that stay stable
Consistent labels save time and prevent confusion. If the finishes schedule calls the main wall paint P-1, the drawings and the specification should use P-1 every time, not “main wall colour” in one place and “feature neutral” in another. The same approach works for benchtops, flooring zones, tile formats, and hardware sets.
This matters most on projects with several decision layers. Once one term shifts, the rest of the documents often drift with it, and the person pricing the job has to guess which version controls.
Treat the schedule as the control document for selections
Schedules keep selection-heavy projects organised. They are especially useful for kitchens, bathrooms, and multi-room renovations, where one product change can affect several drawings and clauses at once. A single schedule stops the body text of the specification from turning into a copy-and-paste maze.
That approach also keeps late selections visible. If a finish is nominated in the schedule but never updated in the spec, the gap shows up during review instead of on site, where it is harder to fix and more expensive to argue about.
Cross-reference before issue, not after problems appear
Poor coordination usually comes from copied manufacturer text that was never edited for the project, or from site conditions that were not reflected across the documents. A formal cross-check before issue reduces that risk and keeps the package aligned with the job at hand. It also fits the discipline of separating functional, performance, and technical requirements so each document does its own job.
The final check is document control. If the specification, drawings, and schedule do not tell the same story, the builder is forced to make assumptions, and assumptions are where disputes grow. A coordinated set of documents gives the builder a single source of truth, which makes arguments about what was meant much harder to sustain.
Avoiding Common Pitfalls and Collaborating with Your Builder
A spec usually goes wrong in the same few ways. The language gets vague, the version history gets messy, the consultant notes never make it into the final issue, or a manufacturer's description is copied in without trimming out irrelevant marketing text. The fix is not more paperwork. It's a better workflow and a cleaner review cycle.
Common mistakes to avoid
- Vague quality language: Terms like “high-quality finish” or “premium standard” sound reassuring, but they don't tell the builder what to install or how to verify it.
- Copying generic product text: Manufacturer copy can be useful, but only after project-specific edits remove anything that doesn't match the actual scope.
- Duplicate requirements: If the same instruction appears in multiple sections, someone will eventually update one copy and miss the other.
- Uncontrolled versions: If the builder, designer, and client are all looking at different drafts, disputes become almost inevitable.
Habits that keep the build on track
A staged workflow helps. First define the problem, then separate functional from nonfunctional requirements, assign stable requirement identifiers, and use acceptance criteria that are observable and testable. That approach is what keeps the document complete, accurate, and consistent (Microsoft spec-writing guidance).
Send the draft early enough for the builder to challenge it while changes are still cheap.
That review should include the people who'll have to deliver the result. Builders spot install issues, estimators spot pricing traps, and designers catch intent that has been lost in translation. If a proposed product is hard to source, hard to maintain, or awkward to install, it's far better to find out before the contract is issued.
Finalise with a controlled issue process
Once the spec is agreed, lock the version, circulate the final set with the drawings and schedules, and keep every later change visible. That protects the project from quiet drift. It also makes substitutions and variations easier to assess because there's a clean baseline to compare against.
Good specifications don't make a project inflexible. They make it buildable.
If you're planning a renovation, extension, or custom home and want the documents, selections, and buildability checks aligned from the start, speak with Templeton Built. A well-coordinated specification saves time, reduces site confusion, and gives your project a much smoother path from concept to handover.


Leave a Reply